Showing posts with label crafts. Show all posts

Sunday, April 19, 2015

DIY: Replacing a Clock Mechanism


A while ago, I bought a beautiful clock at a thrift store! It's made of real wood, stained and glazed, and I just thought it was a really unique piece. However, even after I cleaning it up and replacing the battery, the actual timekeeping function was just completely busted. The clock sat neglected in a corner of my room for a few months... until I decided to try replacing the clock mechanism! It was a lot easier than I thought, so if you're curious about fixing up a broken clock, here's how :)

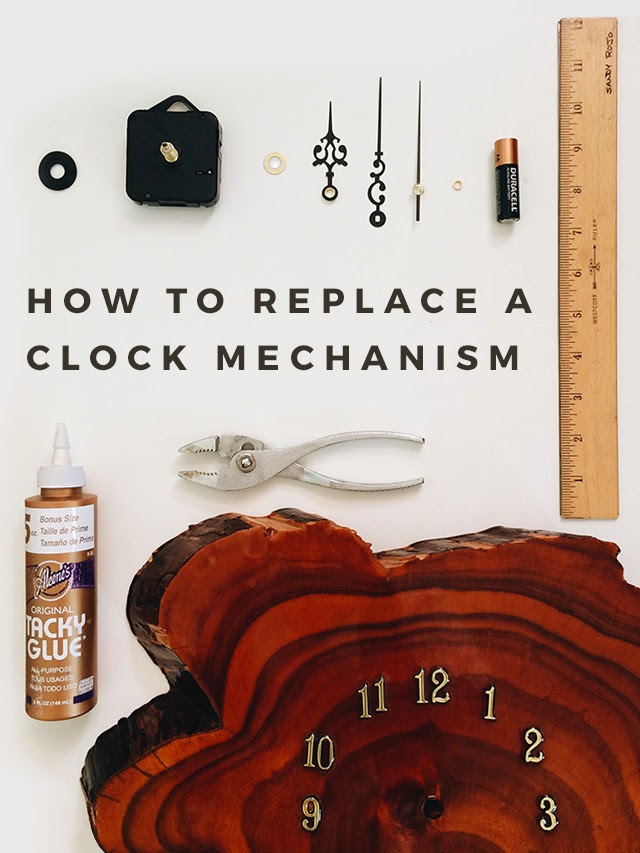
The tools you'll need for this DIY, as shown in the above pic, are:

- An awesome clock that you want to actually work
- Clock mechanism (I got this one at Michael's)
- AA battery
- Craft glue, wood glue, or glue gun
- Slip joint pliers, or some kind of pliers
- Ruler
- Pencil, marker, or some marking tool

Here is the clock! It's gorgeous, but it's nonfunctional because it doesn't move at all... on top of that, the hands were all bent as well. Time to take it apart!


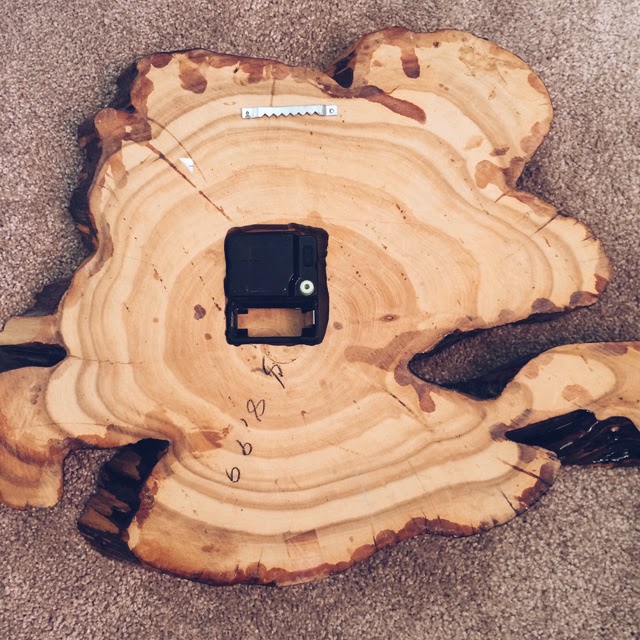
The back side of the clock, which shows the natural wood color, plus the carved part that houses the mechanism.
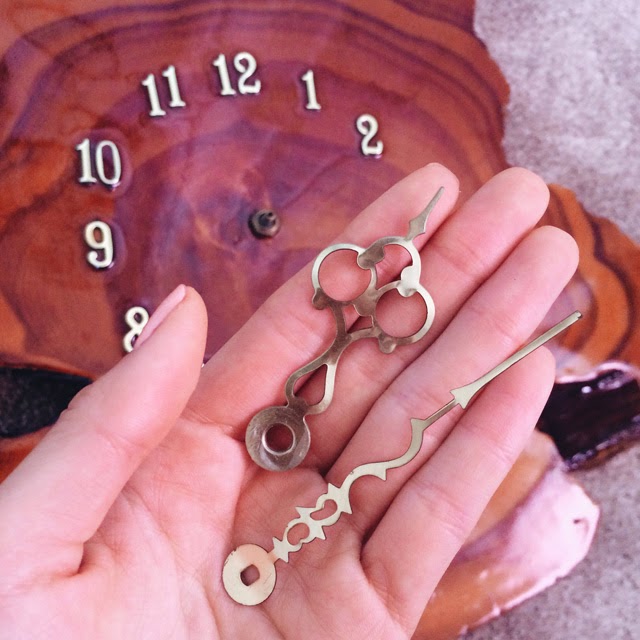


First, I removed the hands and put them aside. They're bent, but since the material is so thin, I was able to straighten them out a bit by hand.


Using your pliers, remove the hex nut carefully!


Once the hex nut is removed, you can just pop the old mechanism out and put it aside.
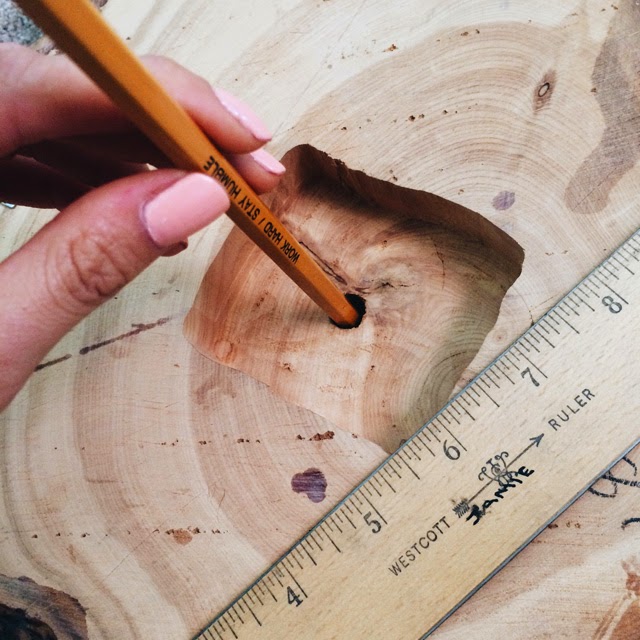

You need to know the width of the clock face in order to buy the correct size mechanism. Since the hole is too narrow for a ruler, I used an unsharpened pencil and marker to see how long the screw needs to be.

When you go to the craft store, you'll likely see many different models of clock mechanisms -- some with ornate hands, some with simple hands, and all in various sizes. The size is printed on the package, and refers to the length of the bolt that will go through your clock face. The mechanism I bought was the 3/8 inch measurement, but I probably should have bought the 5/8 inch version for more allowance.


Your mechanism will come with these components! Before attaching it to the clock, I did a test assembly just to make sure everything worked. Here is the order of assembly:

1. Clock mechanism
2. Rubber ring
3. Clock face
4. Washer
5. Hex nut (the old hex nut I removed didn't fit the new mechanism, so I omitted this)
6. Hour hand
7. Minute hand
8. Nut
9. Second hand

I chose to use the original hands, because I was able to straighten them out so they weren't bent. However, if they had been damaged beyond repair, the new hands would have worked as well! I just wanted to keep as much of the original aesthetic as I could :)


Gluing the mechanism into the wood. I used a combination of craft glue and a glue gun around the edges, to make sure it was really secure.


At first, I thought I was doing it wrong, but it turns out that the hour hand is just very snug and you really do have to use some force to attach it to the bolt. It might feel like you're about to break it, but that's just how it's supposed to work. The minute hand is much easier, and it just slips on.
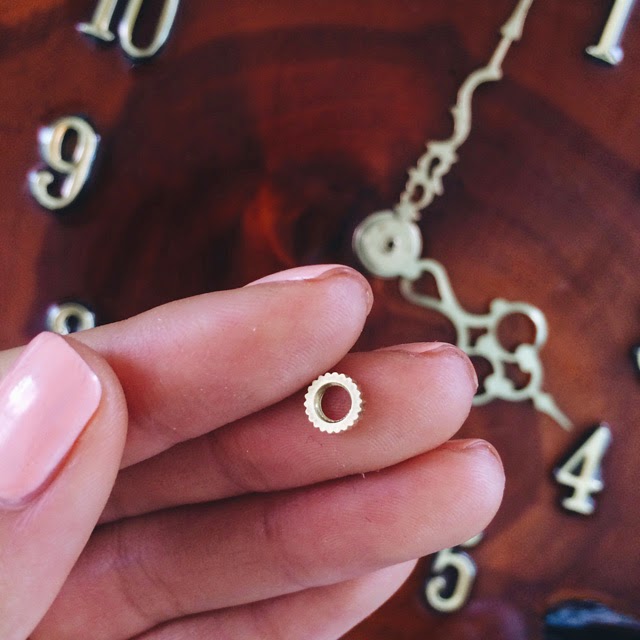

After the minute hand, you have to carefully and tightly screw this teeny tiny little nut on top of it!


Press the second hand on top of the bolt. Like the hour hand, you have to push down slightly harder for this component as well.

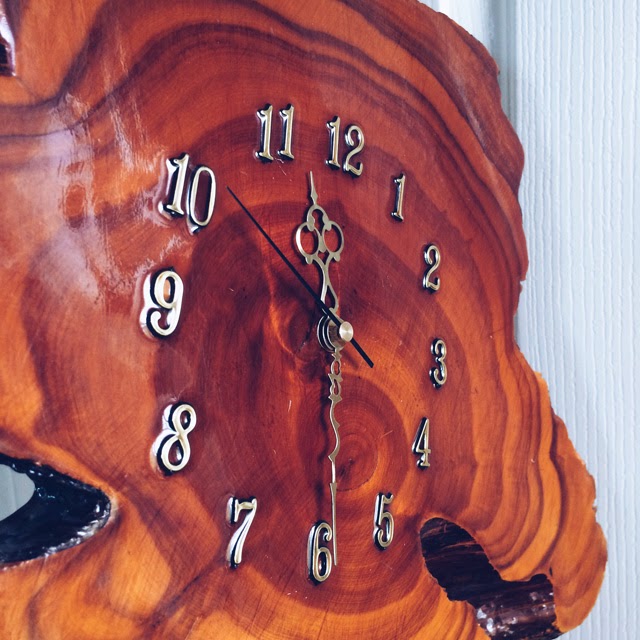
Then, all you have left to do is pop a battery in, turn the dial to the current time, and watch your new clock start ticking away!

Thursday, September 4, 2014

Summer Project: DIY Speakers!


For my birthday, Lucas bought me a DIY Speaker kit! This gentleman really knows how to choose good gifts... I was thrilled. 

If this interests you, the kit can be found on Parts Express here, it's called the "Overnight Sensations" (we agree that it's is a silly, borderline dirty name) Speaker Pair. 

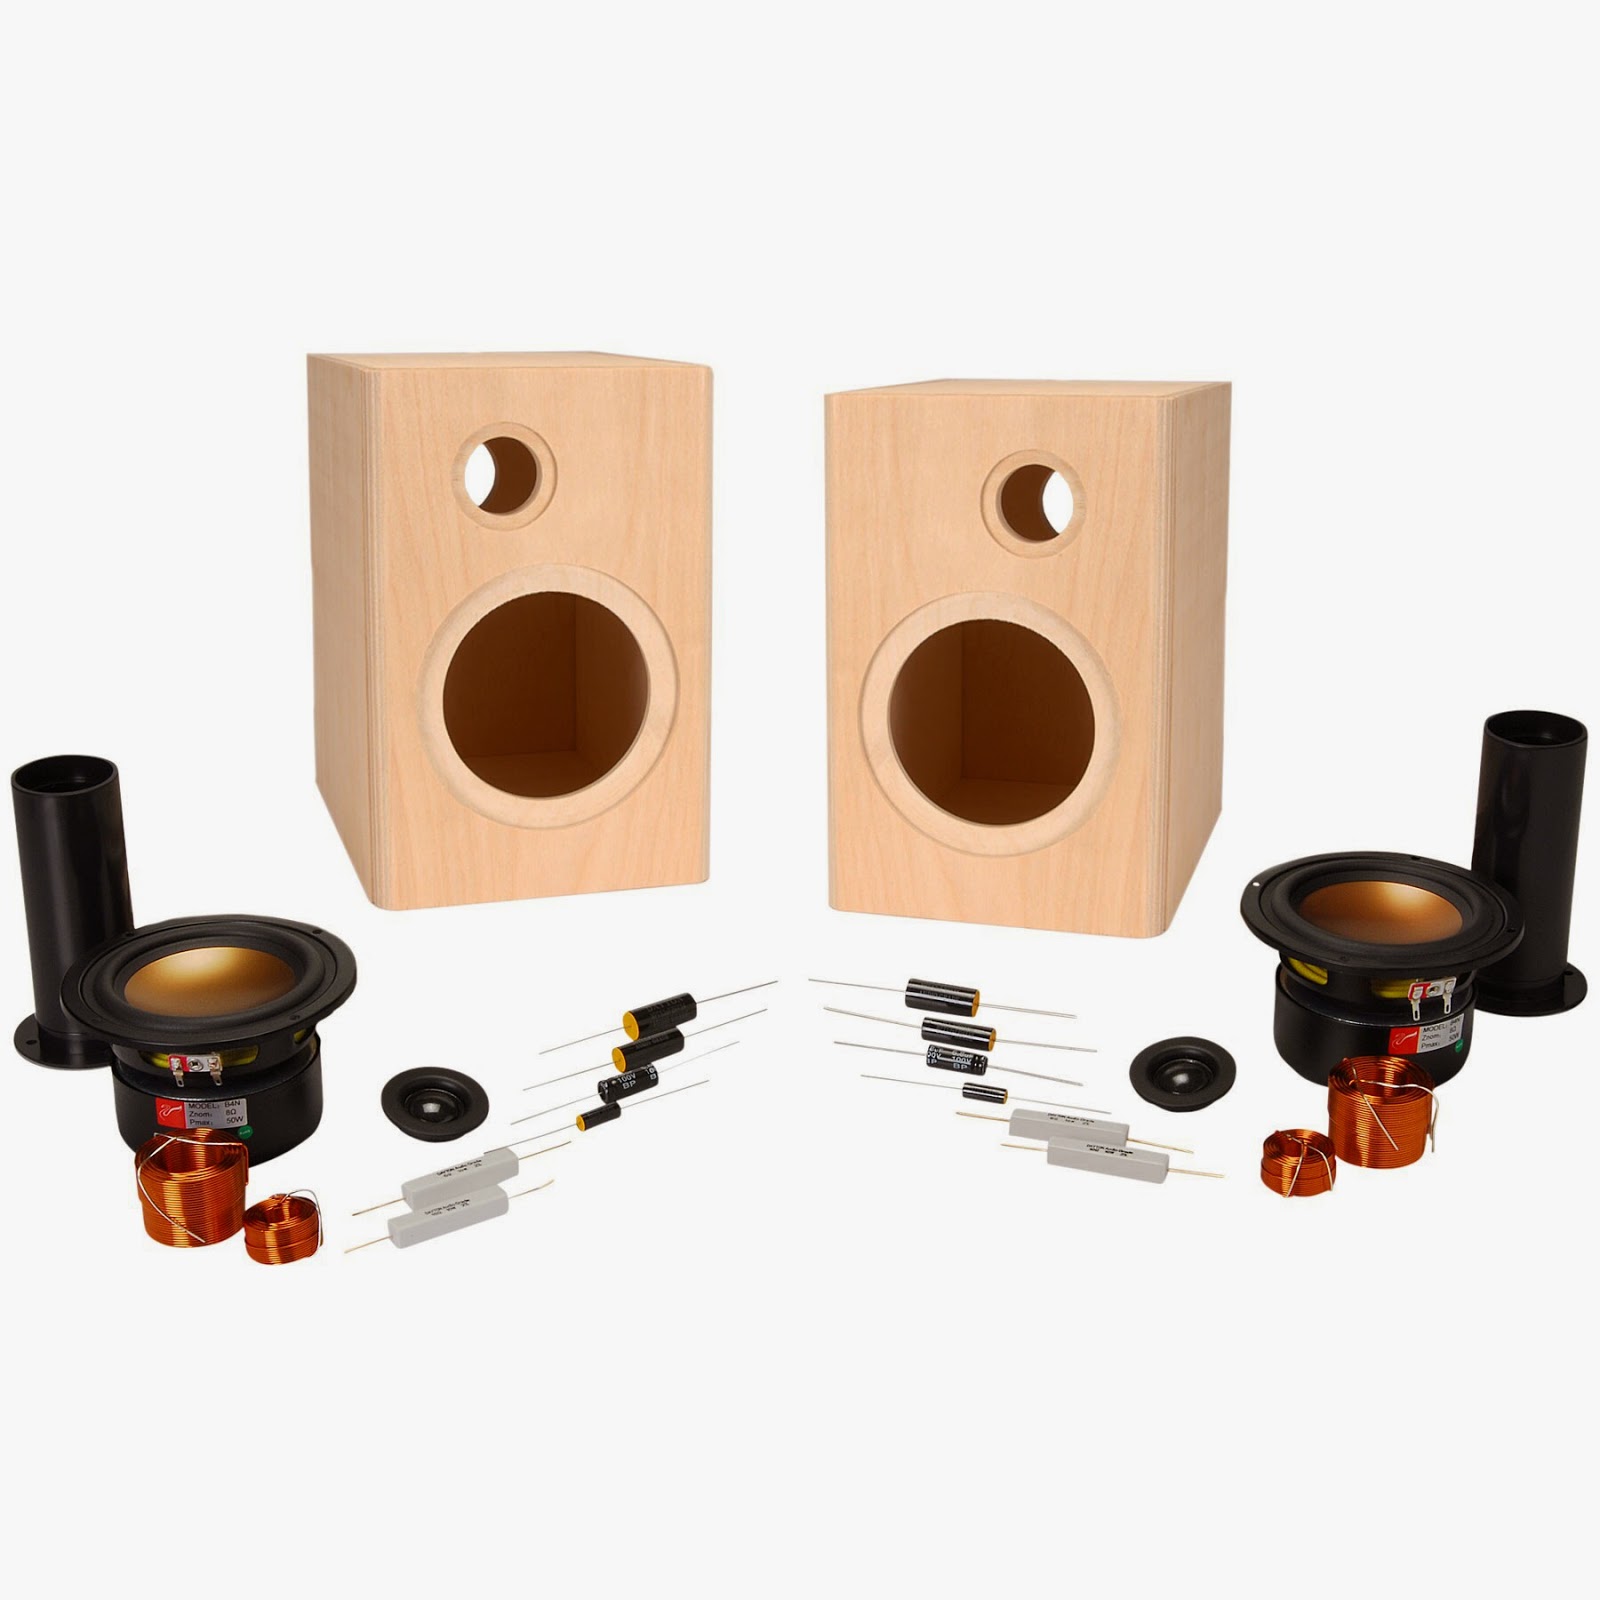
The kit comes with the following materials (this list is taken directly from the product details page.) 
  • Dayton Audio ND20FA-6 3/4" Neodymium Dome Tweeter
  • 2 x Dayton Audio DNR-6.0 6 Ohm 10W Precision Audio Grade Resistor
  • 2 x Mills 10 Ohm 12W Non-Inductive Resistor
  • 2 x Dayton Audio DMPC-0.22 0.22uF 250V Polypropylene Capacitor
  • 2 x Dayton Audio DMPC-1.5 1.5uF 250V Polypropylene Capacitor
  • 2 x Dayton Audio DMPC-2.2 2.2uF 250V Polypropylene Capacitor
  • 2 x Speaker Cabinet Port Tube 1-3/8" ID Adjustable
  • 2 x Jantzen 0.35mH 20 AWG Air Core Inductor Crossover Coil
  • 2 x Jantzen 1.1mH 18 AWG Air Core Inductor Crossover Coil
  • 2 x HiVi B4N 4" Aluminum Midbass Round Frame
  • 2 x Dayton Audio PMPC-6.8 6.8uF 250V Precision Audio Capacitor
  • 1 x Precut Birch Wood Cabinet Pair 
Kit materials. Photo taken from Parts Express.
 In addition to the pre-assembled kit supplies, we also needed and acquired the following items: 
  • Soldering Kit
  • Speaker Wire
  • Binding Posts
  • Piece of Wood Board (on which to assemble your crossover)
  • Wood Glue
  • Wood Conditioner
  • Wood Stain
  • Wood Poly Finish
  • Sandpaper (I used 220 Extra Fine) 
  • Drill and various size drill bits
  • Small Screws 
  • Screwdriver
  • Needle-nose Pliers
  • Super Glue and Glue Gun
  • Zip Ties
  • Acoustic Stuffing (unfortunately, pillow stuffing is not a suitable substitute) 
  • An Amp
  • Adult Supervision -- oh wait, we are adults now. Hah!
Upon opening the kit, I will admit that it's pretty intimidating. Please note that I have zero understanding of EE... my dad is an audiophile who has, over the years, accumulated mind-boggling amounts of audio equipment and could probably Macguyver a radio out of anything. For me, on the other hand, this was out of my element.

So, I decided to start with the cabinet, since that's easier and more similar to the crafts I'm used to. 


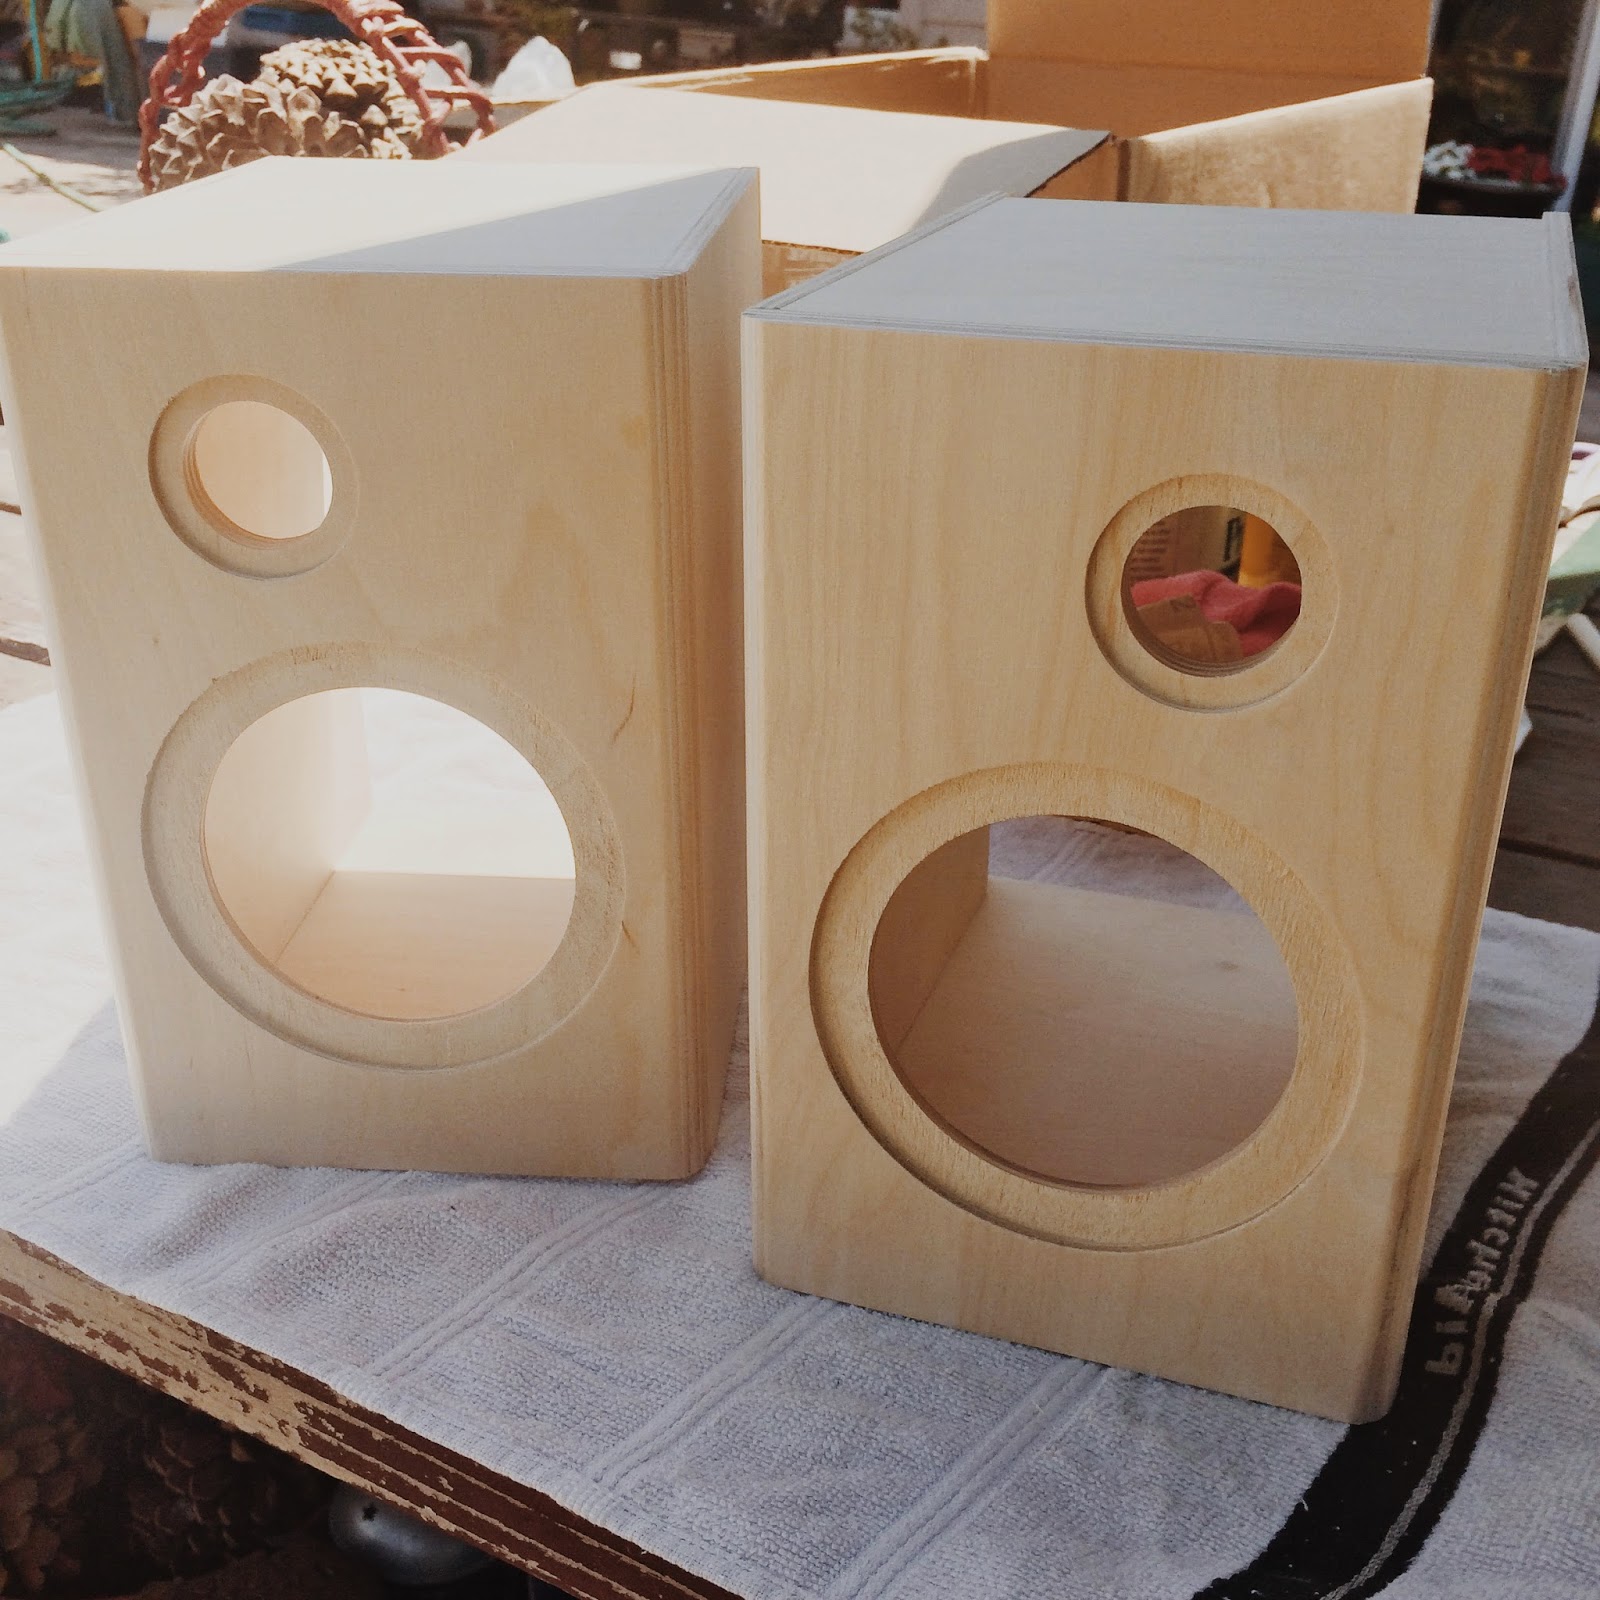
The cabinet pieces look like this -- unfinished birch. Pretty! Each piece has been cut so that they fit together like a jigsaw puzzle. The surface isn't super smooth, so I wanted to sand it down a bit. 
Girl are you 220 grit because you are EXTRA FINE ;)
I used 220 grit sandpaper for this task. Ideally, you'd affix this to a sanding block and rub that on the surface. I don't have a sanding block, so I made a makeshift one out of a square bottle of leather conditioner (see DIY Belt post) and a hand towel. 


Assembling our cabinets! This isn't necessarily a two person job, but it is a LOT easier if one person assembles the pieces, another person applies the glue, and the assembler holds the pieces in place while the glue dries. 


All done! Now that the cabinets were assembled, it was time to paint them. I also know nothing about staining wood, other than the fact that my dad had stained our dining room table a while ago. So, I went scouting in the garage and found a can of Minwax wood conditioner and Minwax wood stain. 


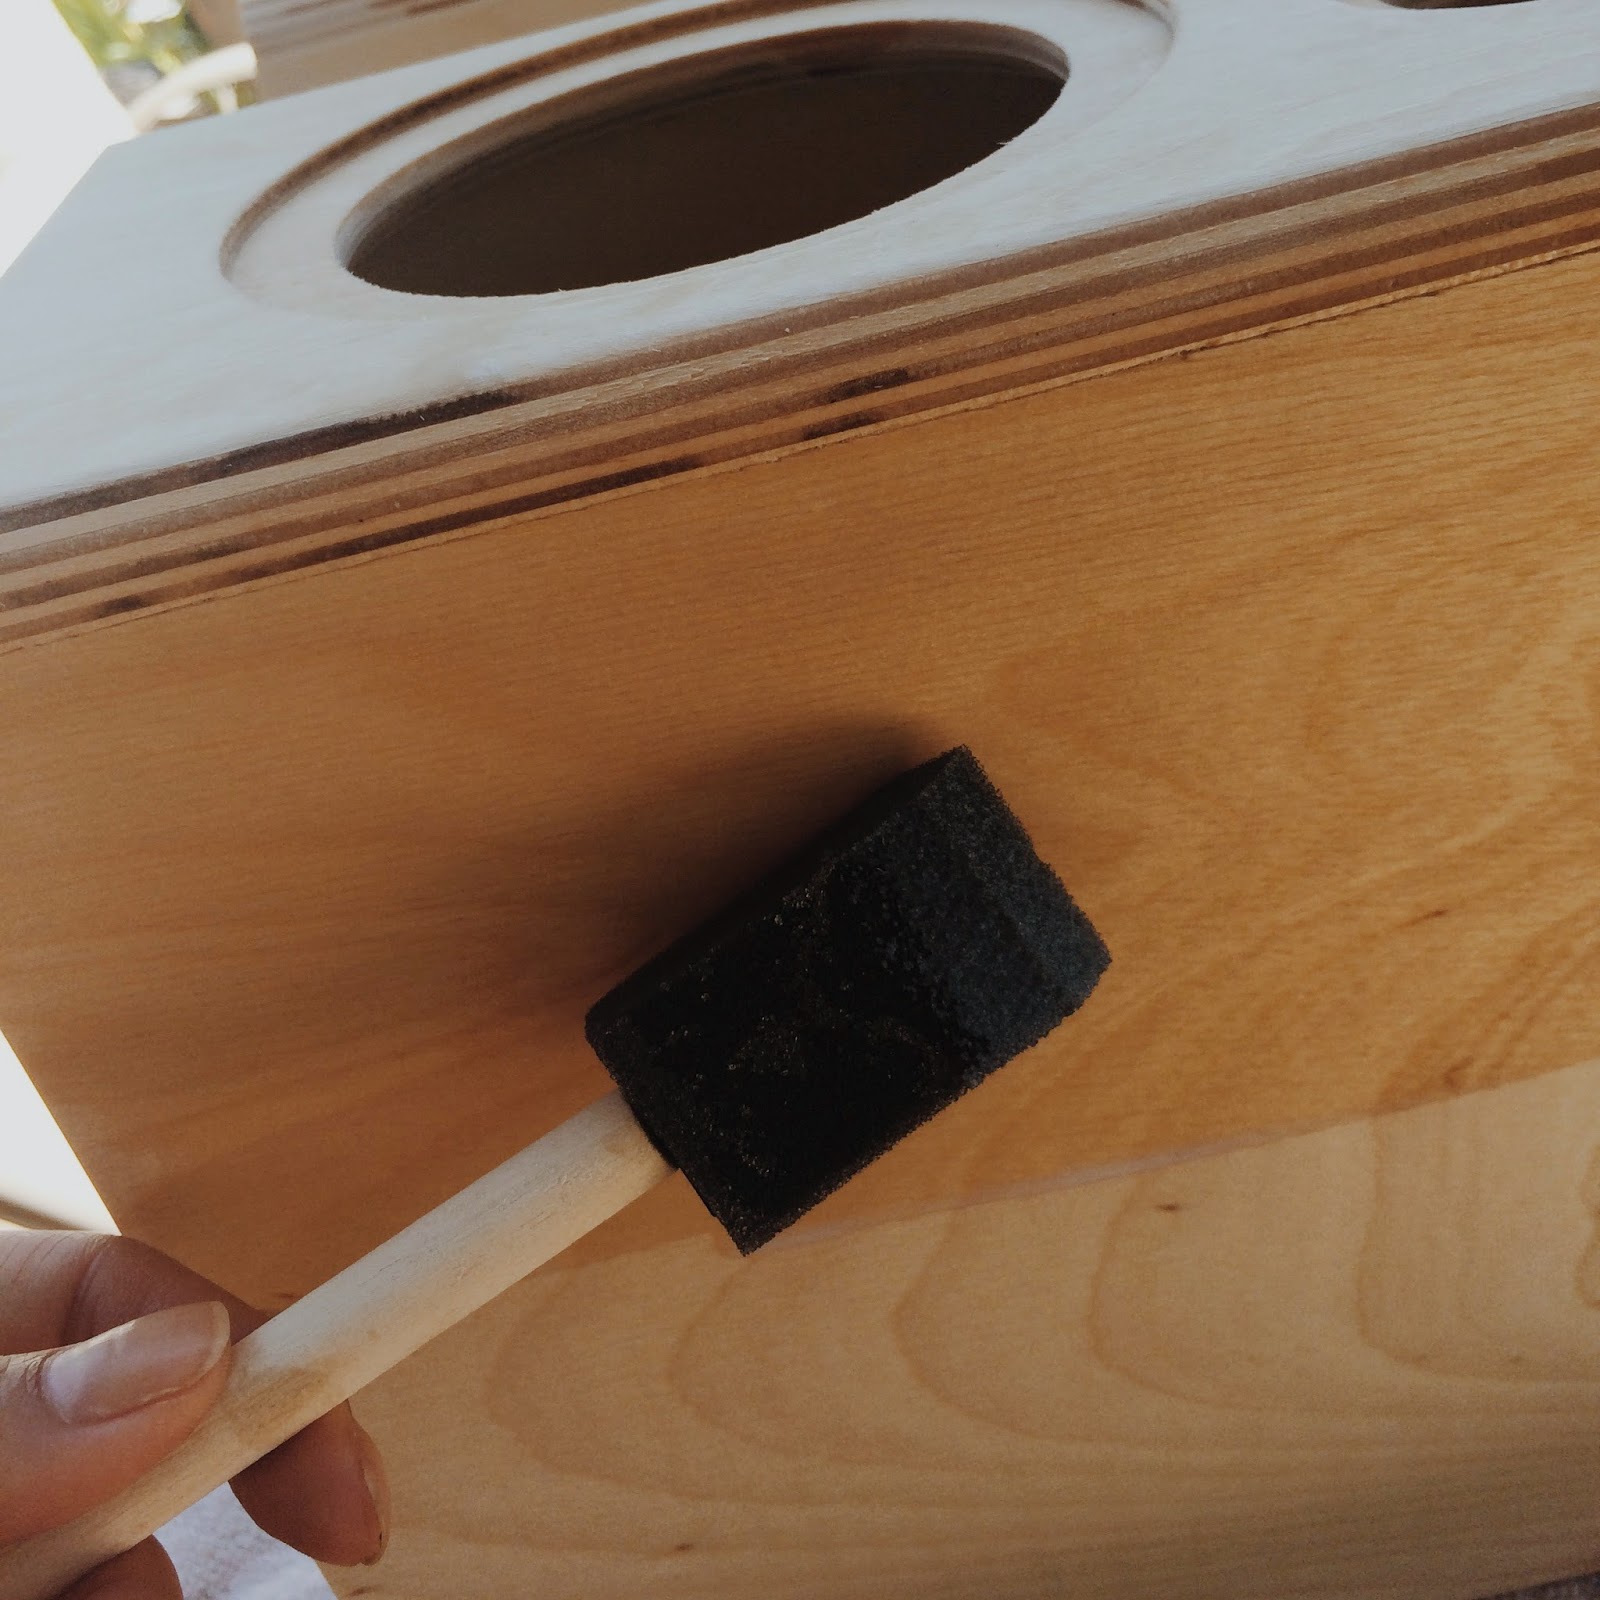
First, the wood conditioner! It's a milky-looking liquid that darkens the wood slightly. What it is actually doing is filling in the tiny gaps between the wood grains, so that the stain will apply evenly. 


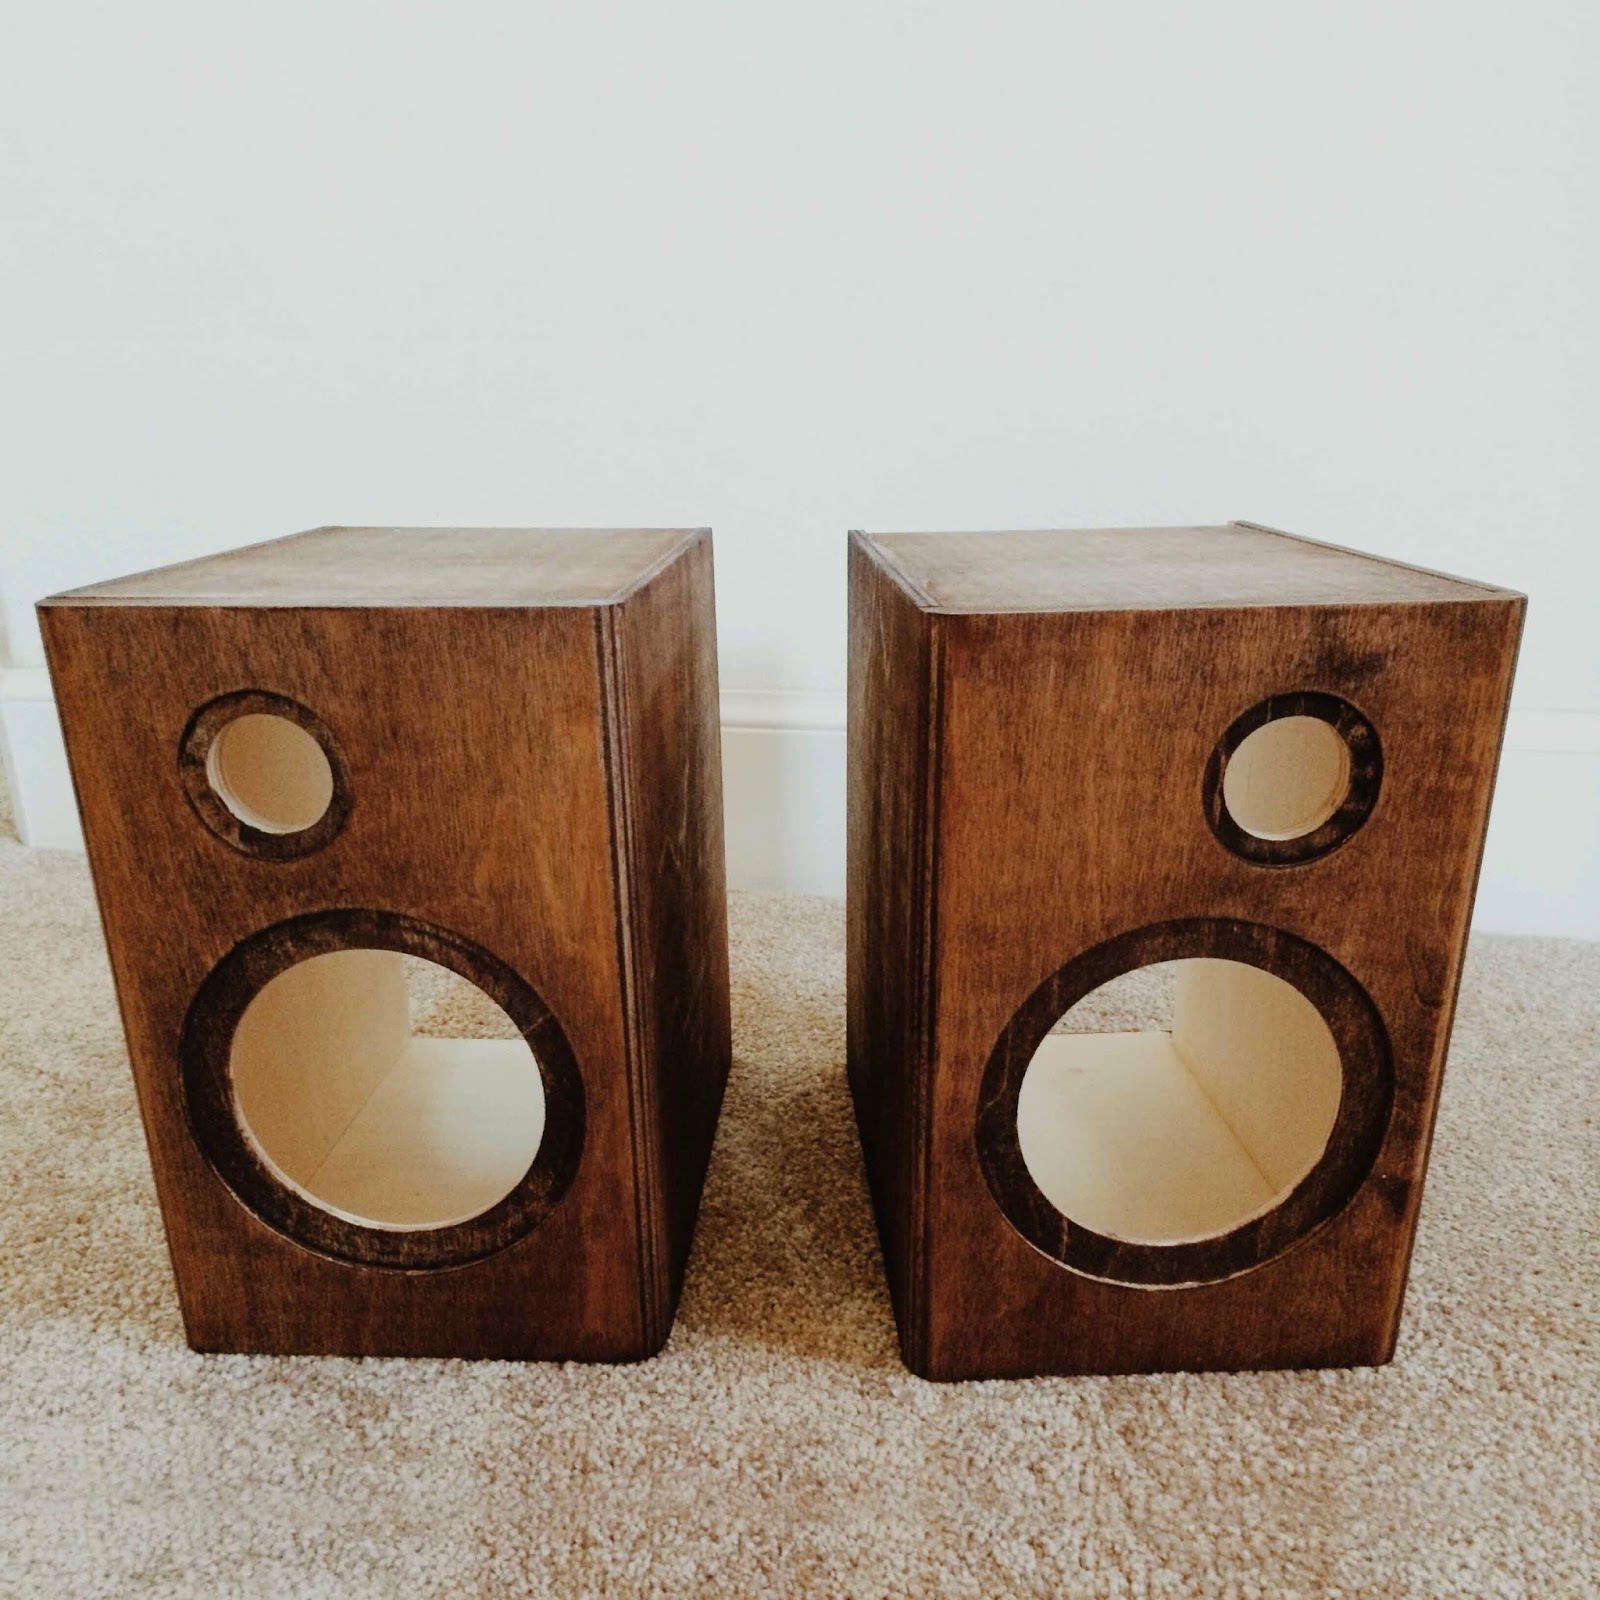
I didn't have any photos of the actual painting process because I got stain all over my hands... so here's the finished result! I used a mahogany color, just because it's what we had in the garage. This is about 2 coats of mahogany, so it looks more like walnut. If I wanted that real dark, bordeaux mahogany look, I'd have to apply about 4 or 5 coats. 

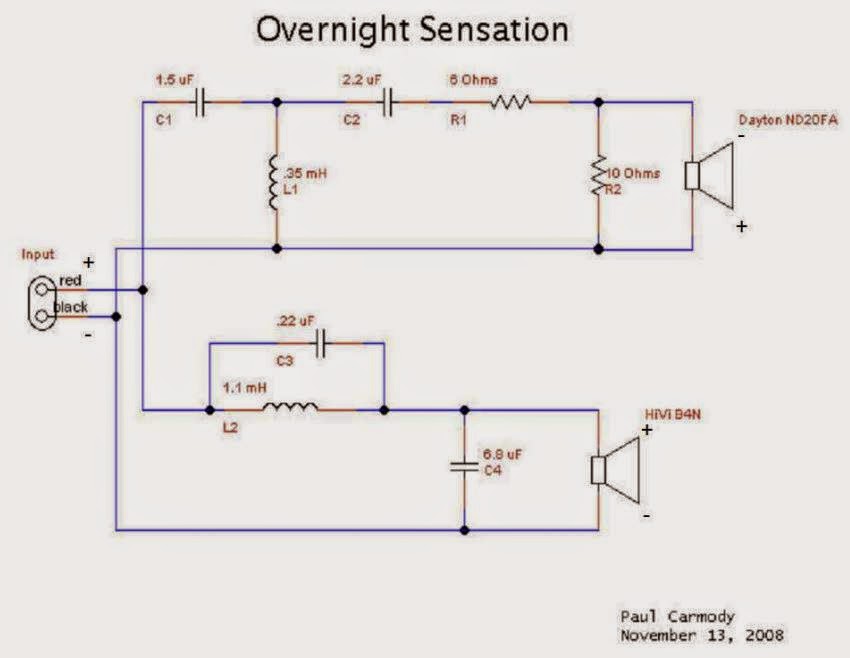
The next part was building the interior. Again, let me remind you that I have no audio/electrical engineering experience, so when I opened up the crossover document and saw this, mild panicking ensued. 

...What?
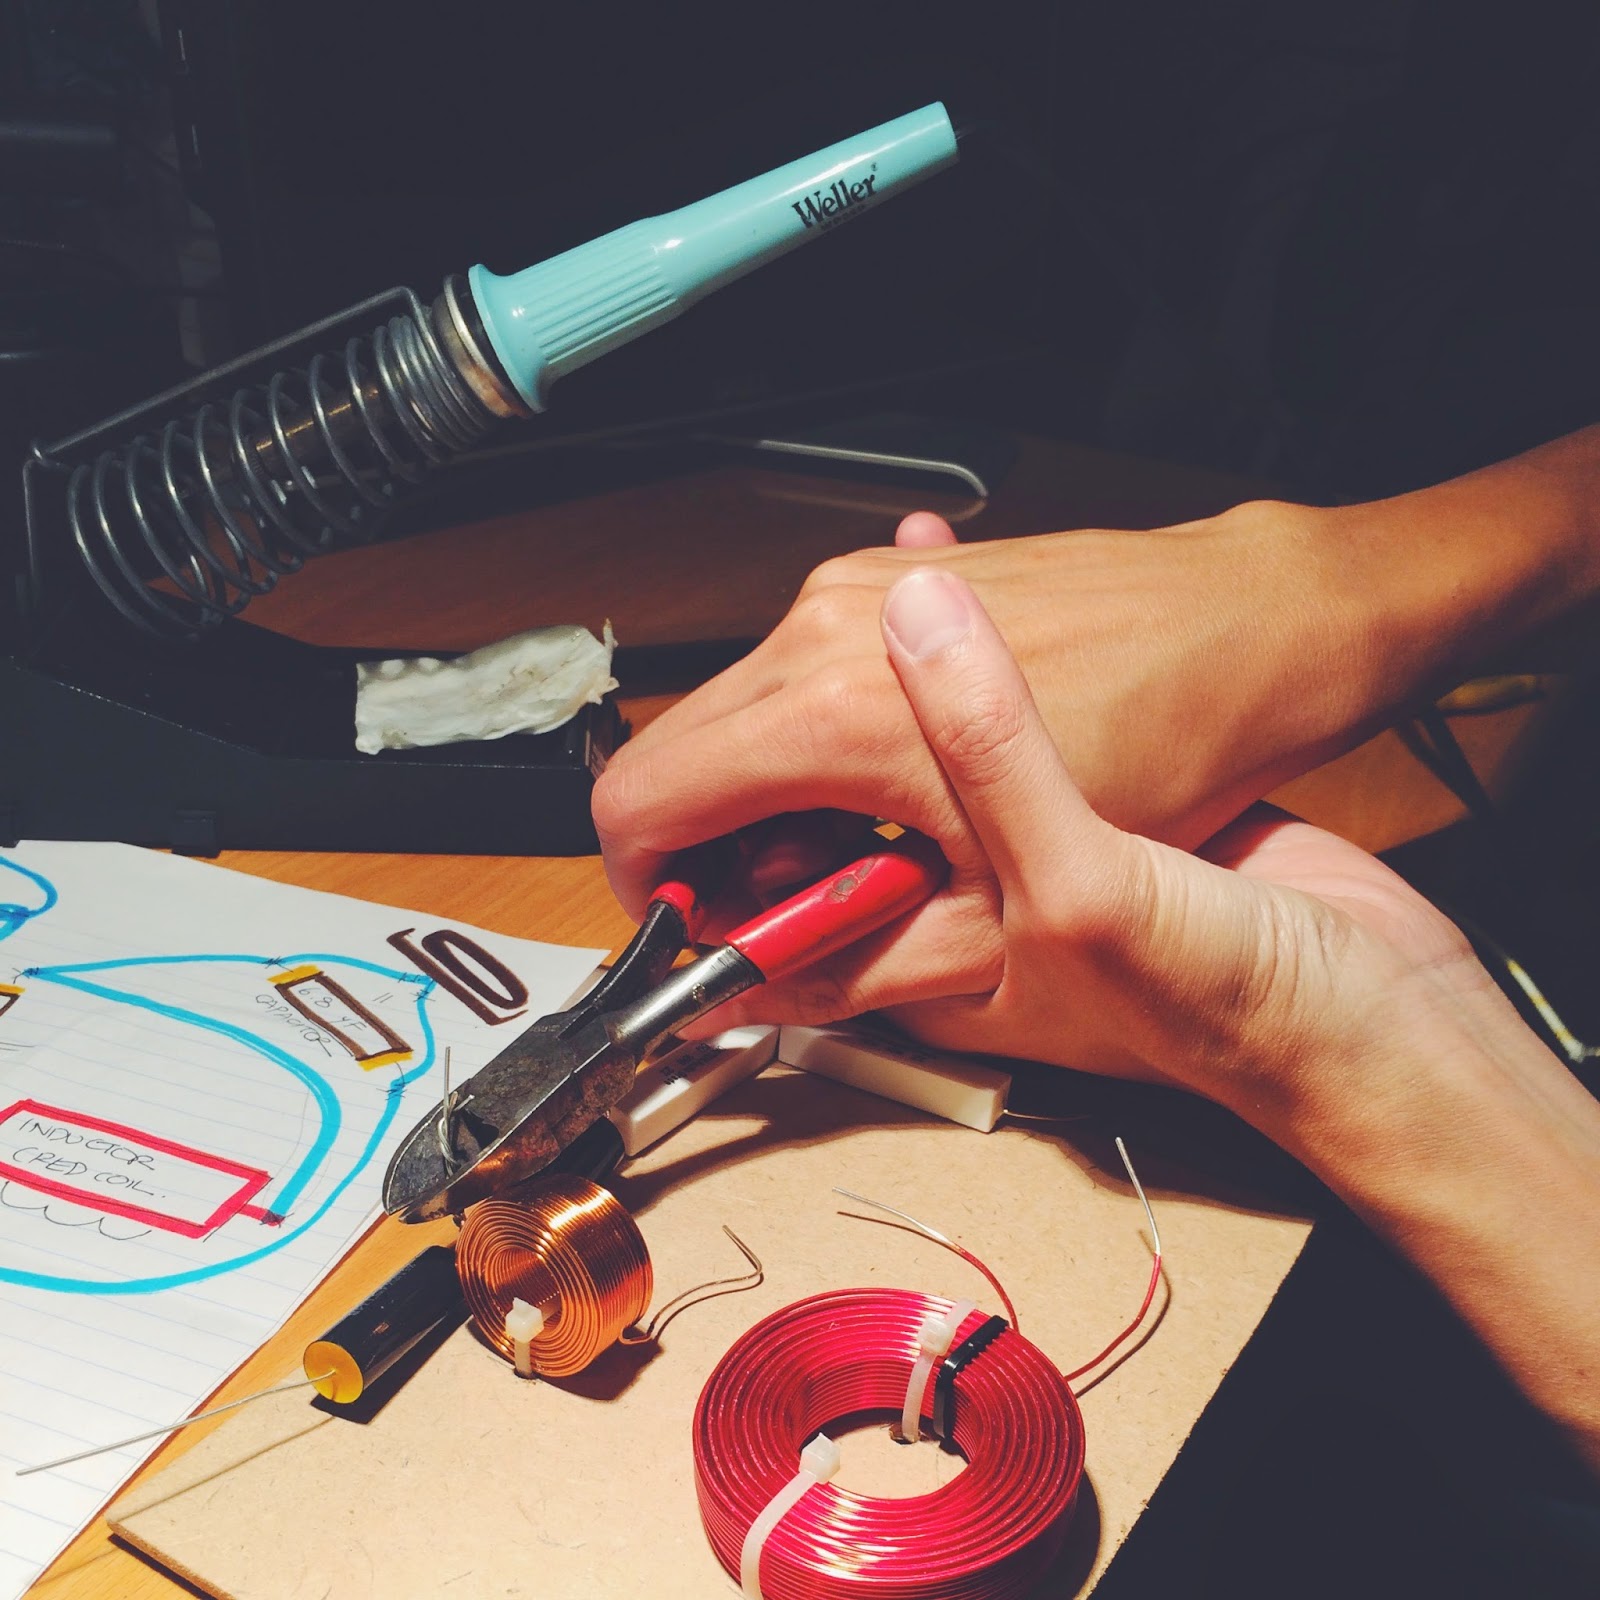
Now I understand that for those of you with EE backgrounds, this is child's play, so bear with me here. I found another illustrated visual version uploaded by a nice gentleman on YouTube who was working on the same project. From this, we drew our own color-coded version, and got to work. Every few minutes, I would remind myself that Resistors = Rectangles and Capacitors = Cylinders. 

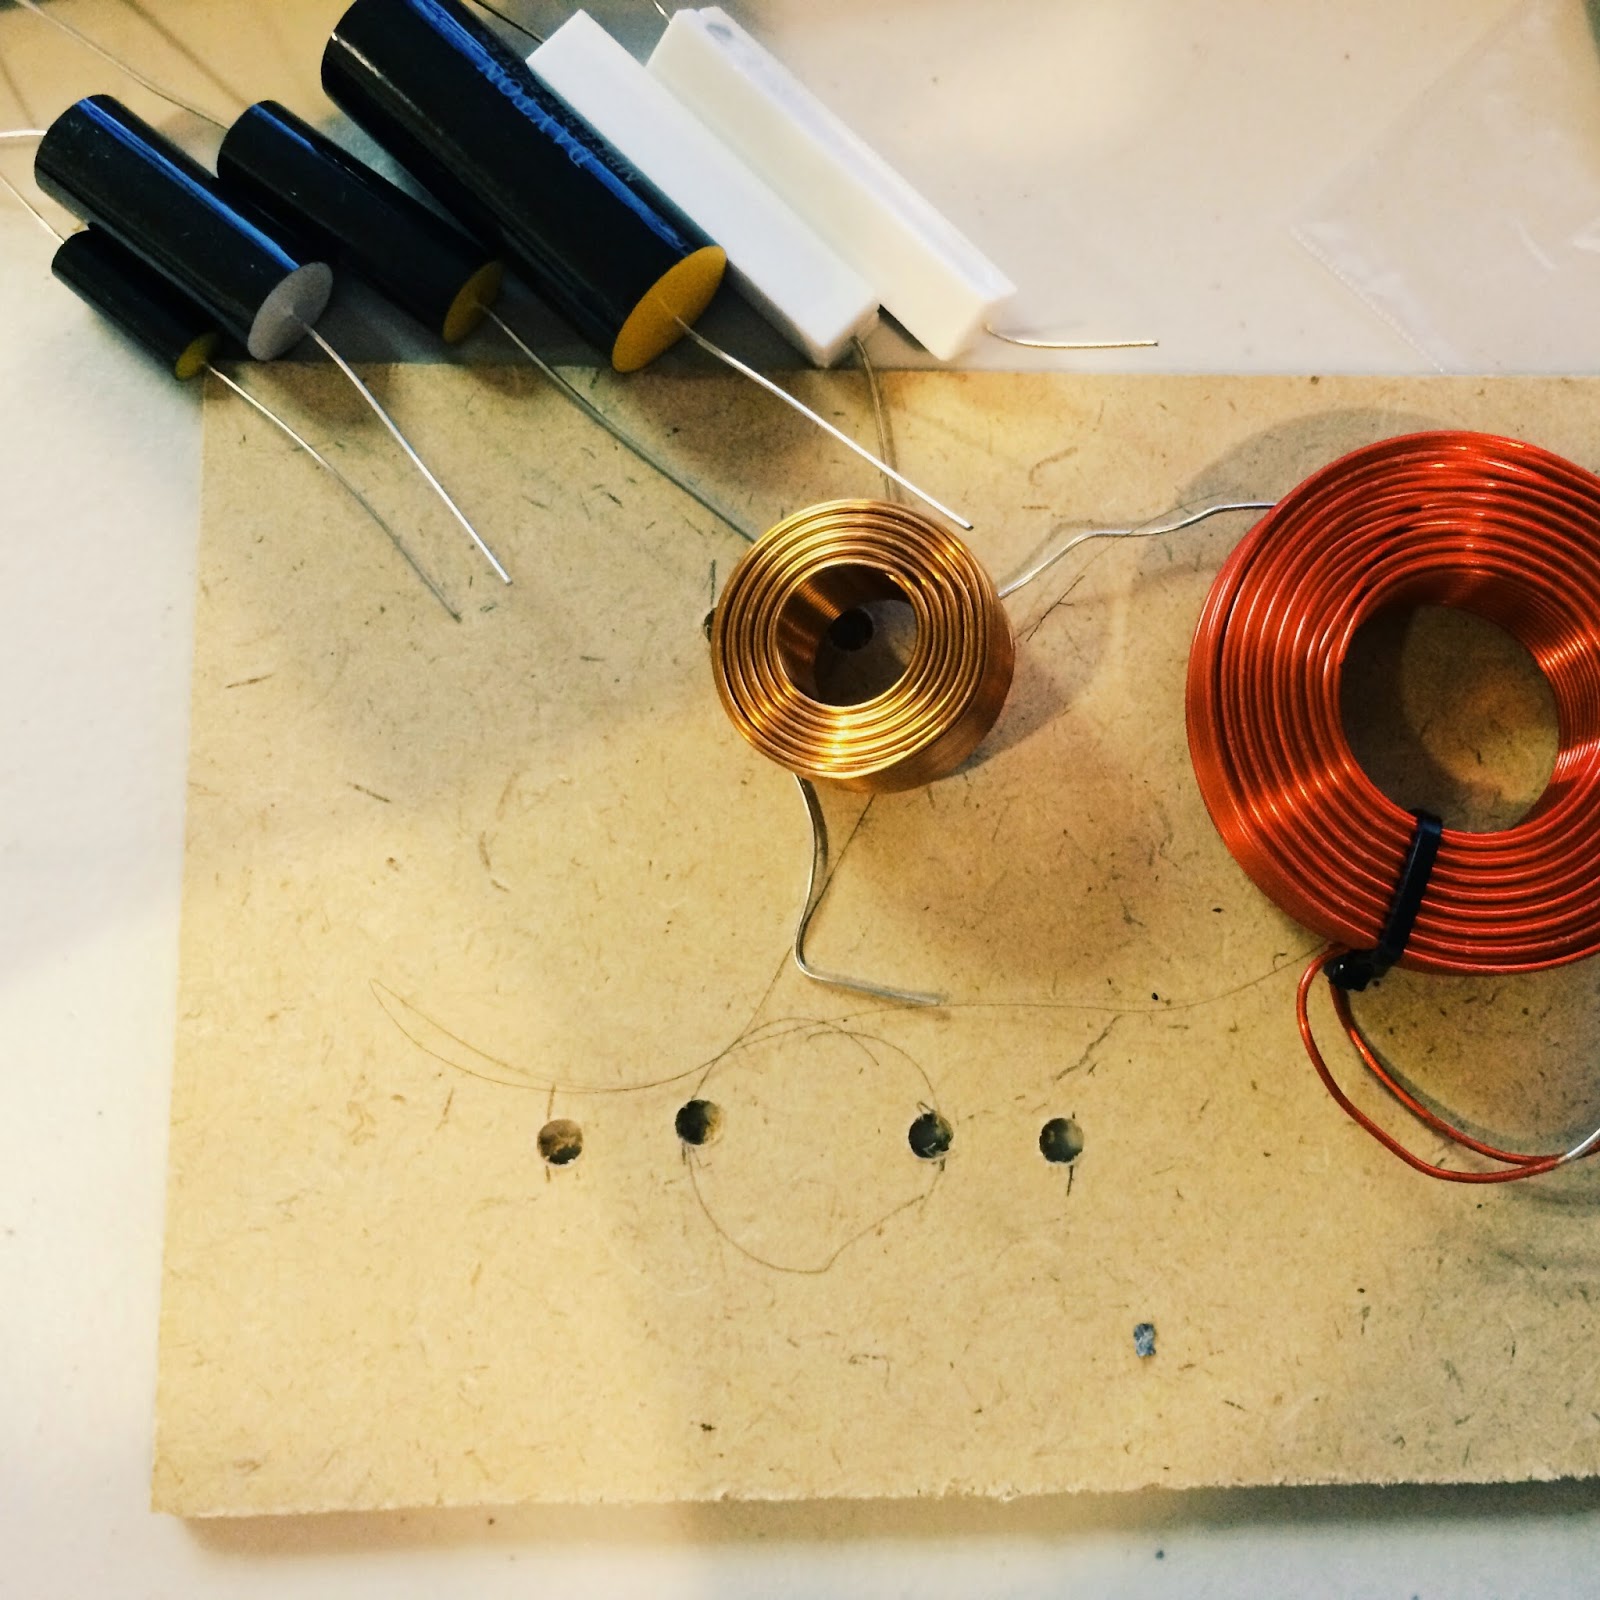
Putting our inductors in first! 
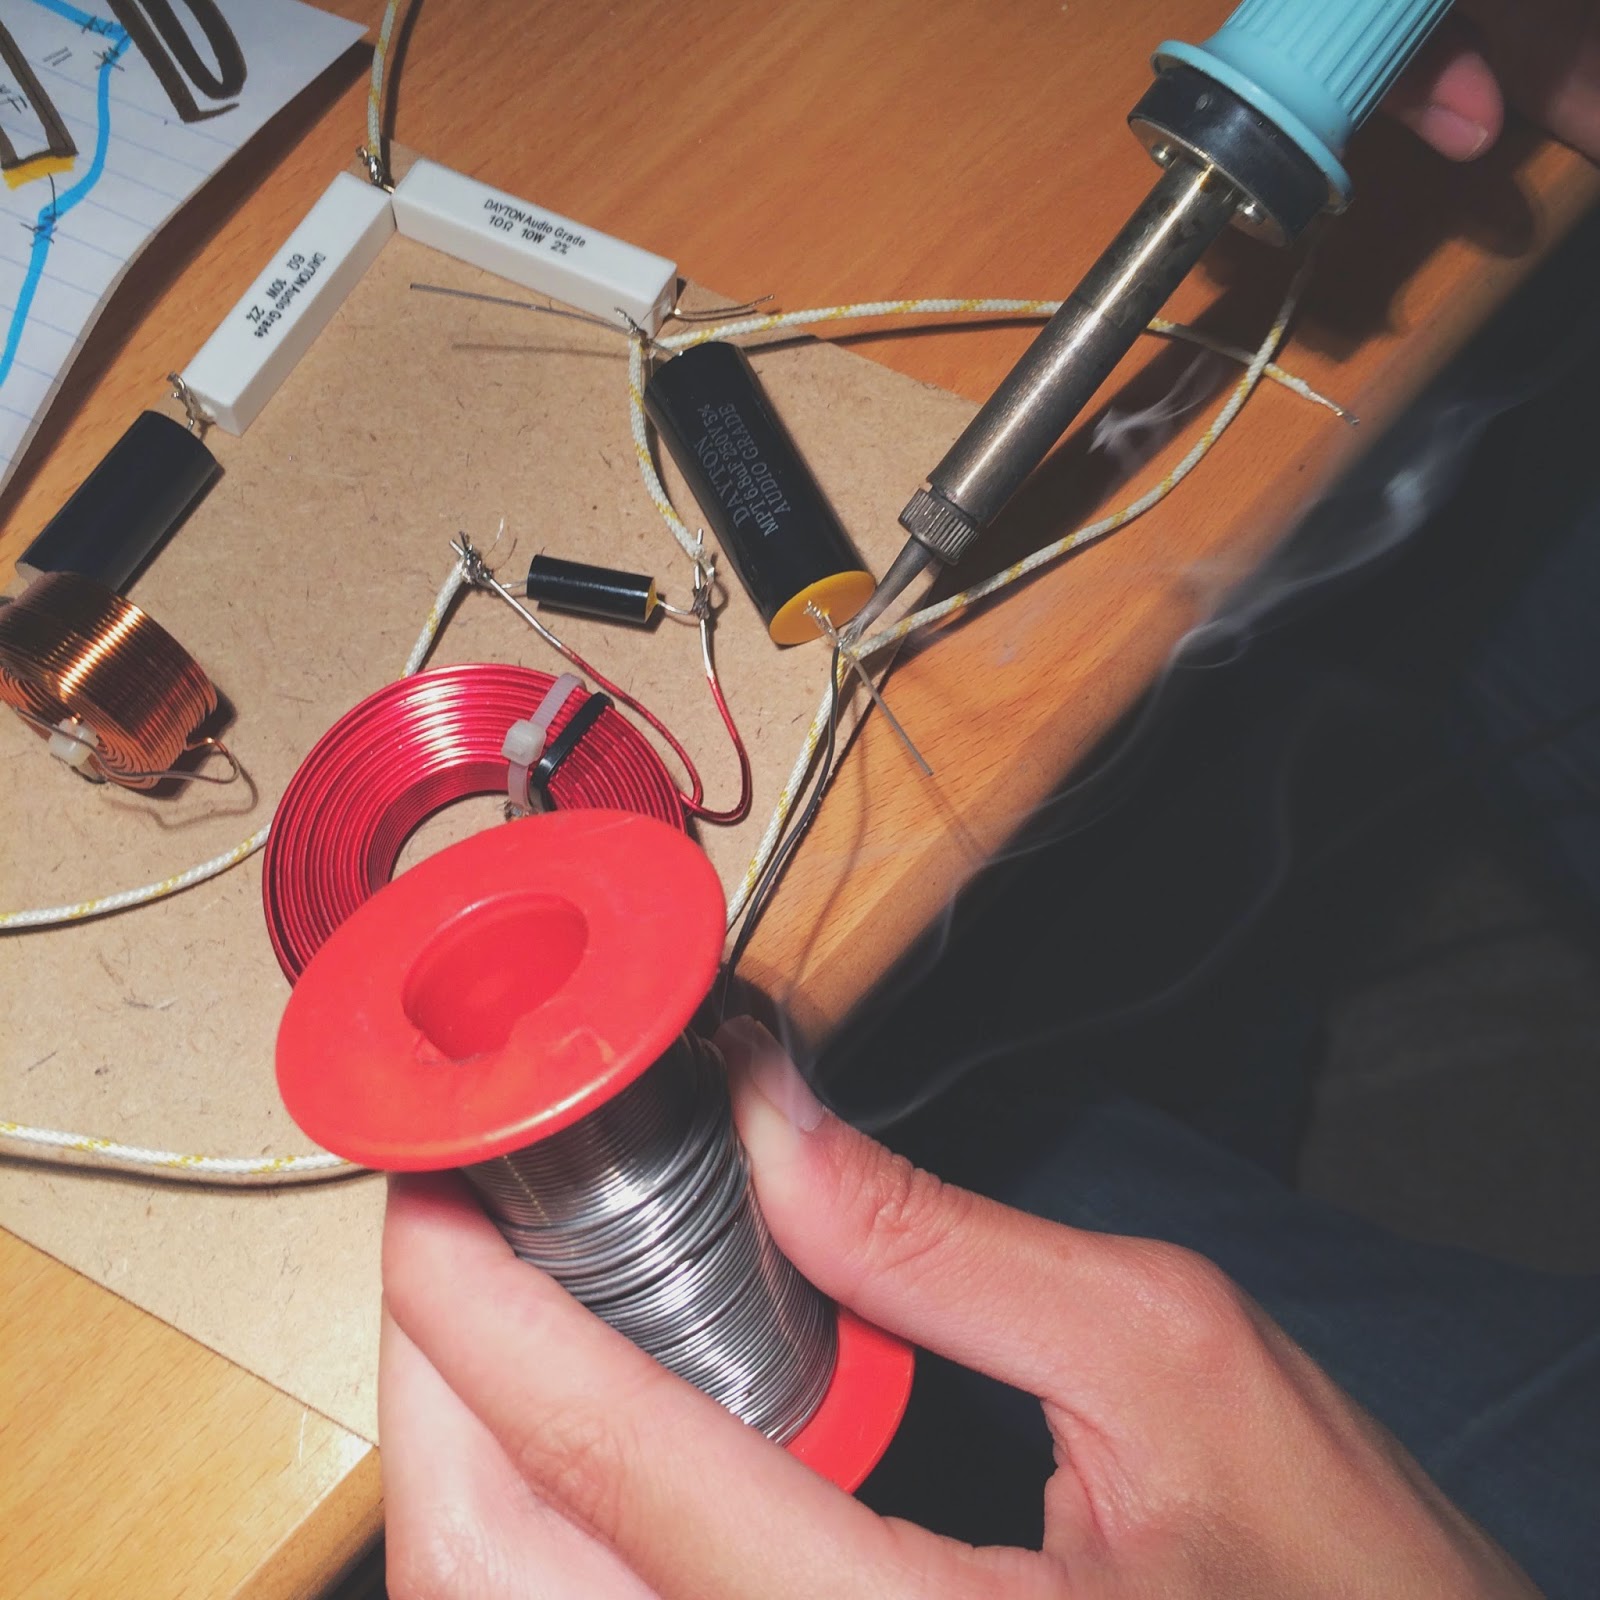
We sawed an spare piece of wood board (taken from the back of an old picture frame) into a 5x7 rectangle, and then drilled holes to zip tie the inductors firmly to the board. After laying everything out and triple-checking that everything was in the right place, the soldering began!


Lucas actually taught me how to solder about two or three years ago. (We had yanked all the keys out of his mechanical keyboard, attached new switches to them, and soldered everything back together.) I'm decent at soldering, but pretty terrible at un-soldering... luckily for me, this mainly just involved soldering parts together. 


Clipping loose ends! You can see our childishly drawn, color coded crossover in the background of this photo.

After assembling the crossover, we wanted to be 100% sure we had done it right. By connecting the speaker wires to an old battery, and the other ends to the bass, we found that tapping the wires to the battery would create a static sound. I have literally never been so thrilled to hear static in my life. Yes, you could even say I was ecSTATIC about it ;D


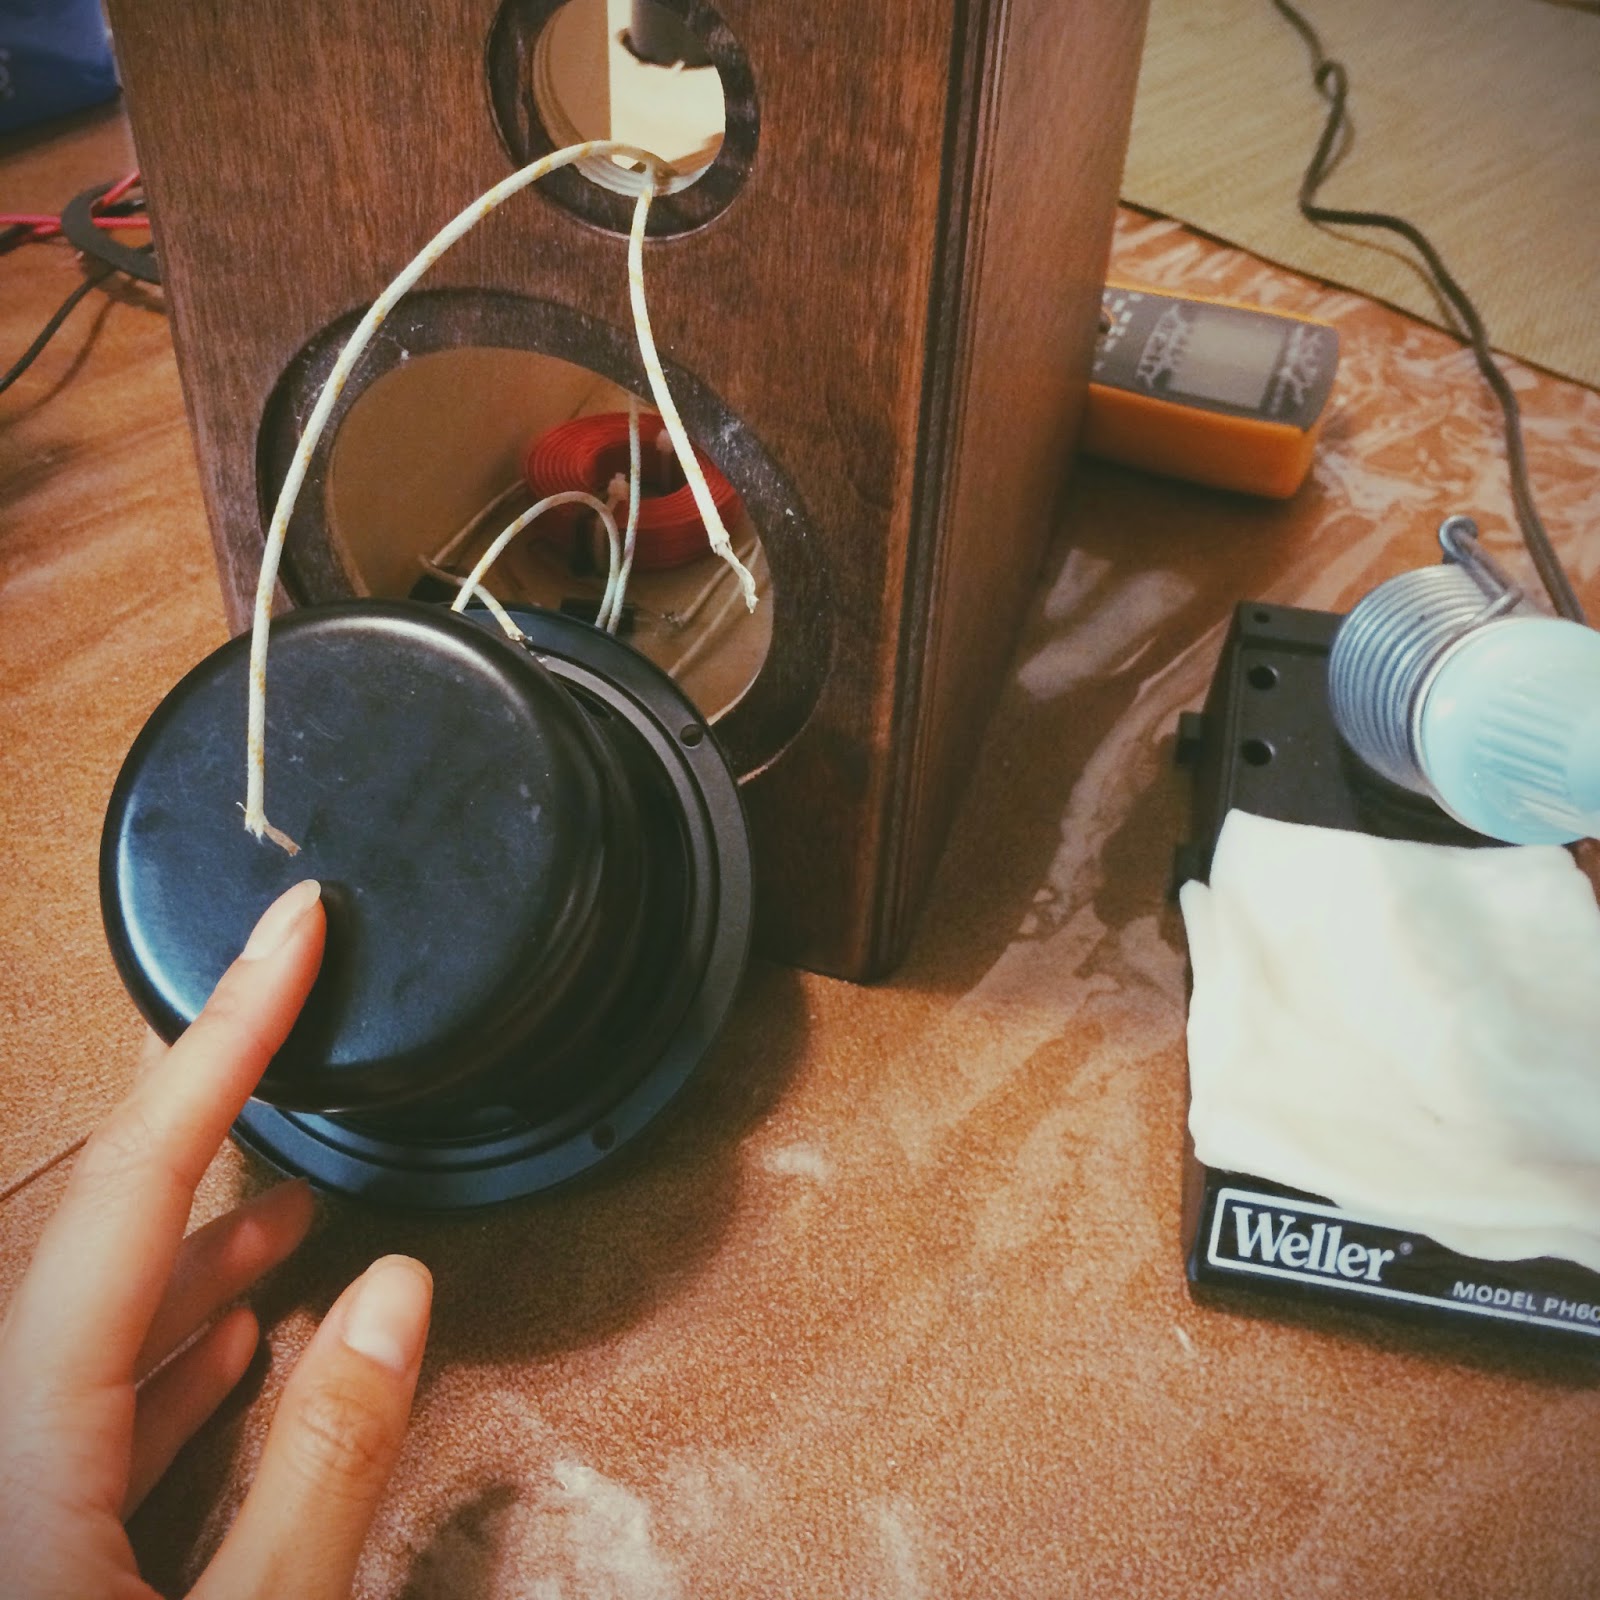
Now that we had the cabinets and the crossover assembled, it was time to put the entire thing together! Using hot glue, we glued the crossover to the bottom, making sure that the speaker wires were pointing the correct ways. The wire attaches to these teeny tiny forks coming from the bass and the tweeter, and getting it connected is kind of like threading a needle. Having needle-nose pliers at this step really helps.

Threading the speaker wire to the tweeter
We got some help from Lucas' dad at this point, in drilling holes for the screws. The wood isn't the best quality, so you had to drill it very carefully or else it would split. There is also very little room for error, because the bass and tweeter sit real flush into the wood.

His dad punched some dents with an awl and then drilled very slowly using a tiny size drill bit, and we did the rest with a normal screwdriver. I originally wanted black screws, but the only screws we had on hand that were small enough were these tiny, rusted metal ones. Turns out, I actually really like the rusted screws because it matches the walnut-esque wood color, and it makes the speakers look vintage :)

We also had to drill holes for the binding posts, which twist onto the back panel and connect to another set of speaker wire ends. Unfortunately, I didn't get any photos of this part either.


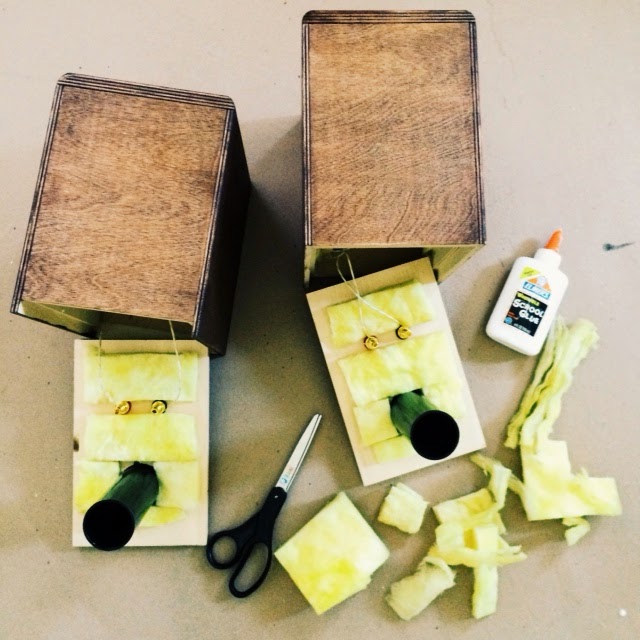
The next step was to pad the cabinet walls with acoustic stuffing! My dad conveniently had a sheet of this stuff lying around. It kind of looks like a cross between baklava and tamago sushi: bright, egg yellow, with lots of layers. I cut it up into pieces and glued them down with normal school glue, making sure to not accidentally glue any of the loose wires. 


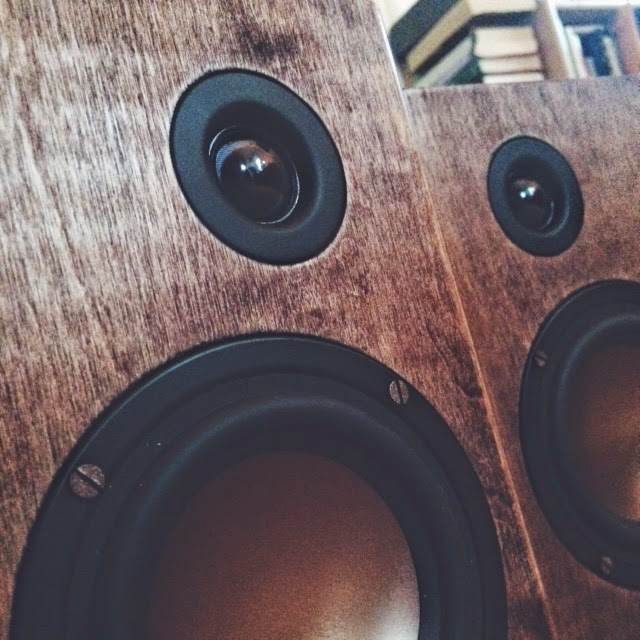
This is what my speaker pair looks like when completed! I am really happy with how they turned out :) The bronze colored basses really go with the wood color, as well as the screws.

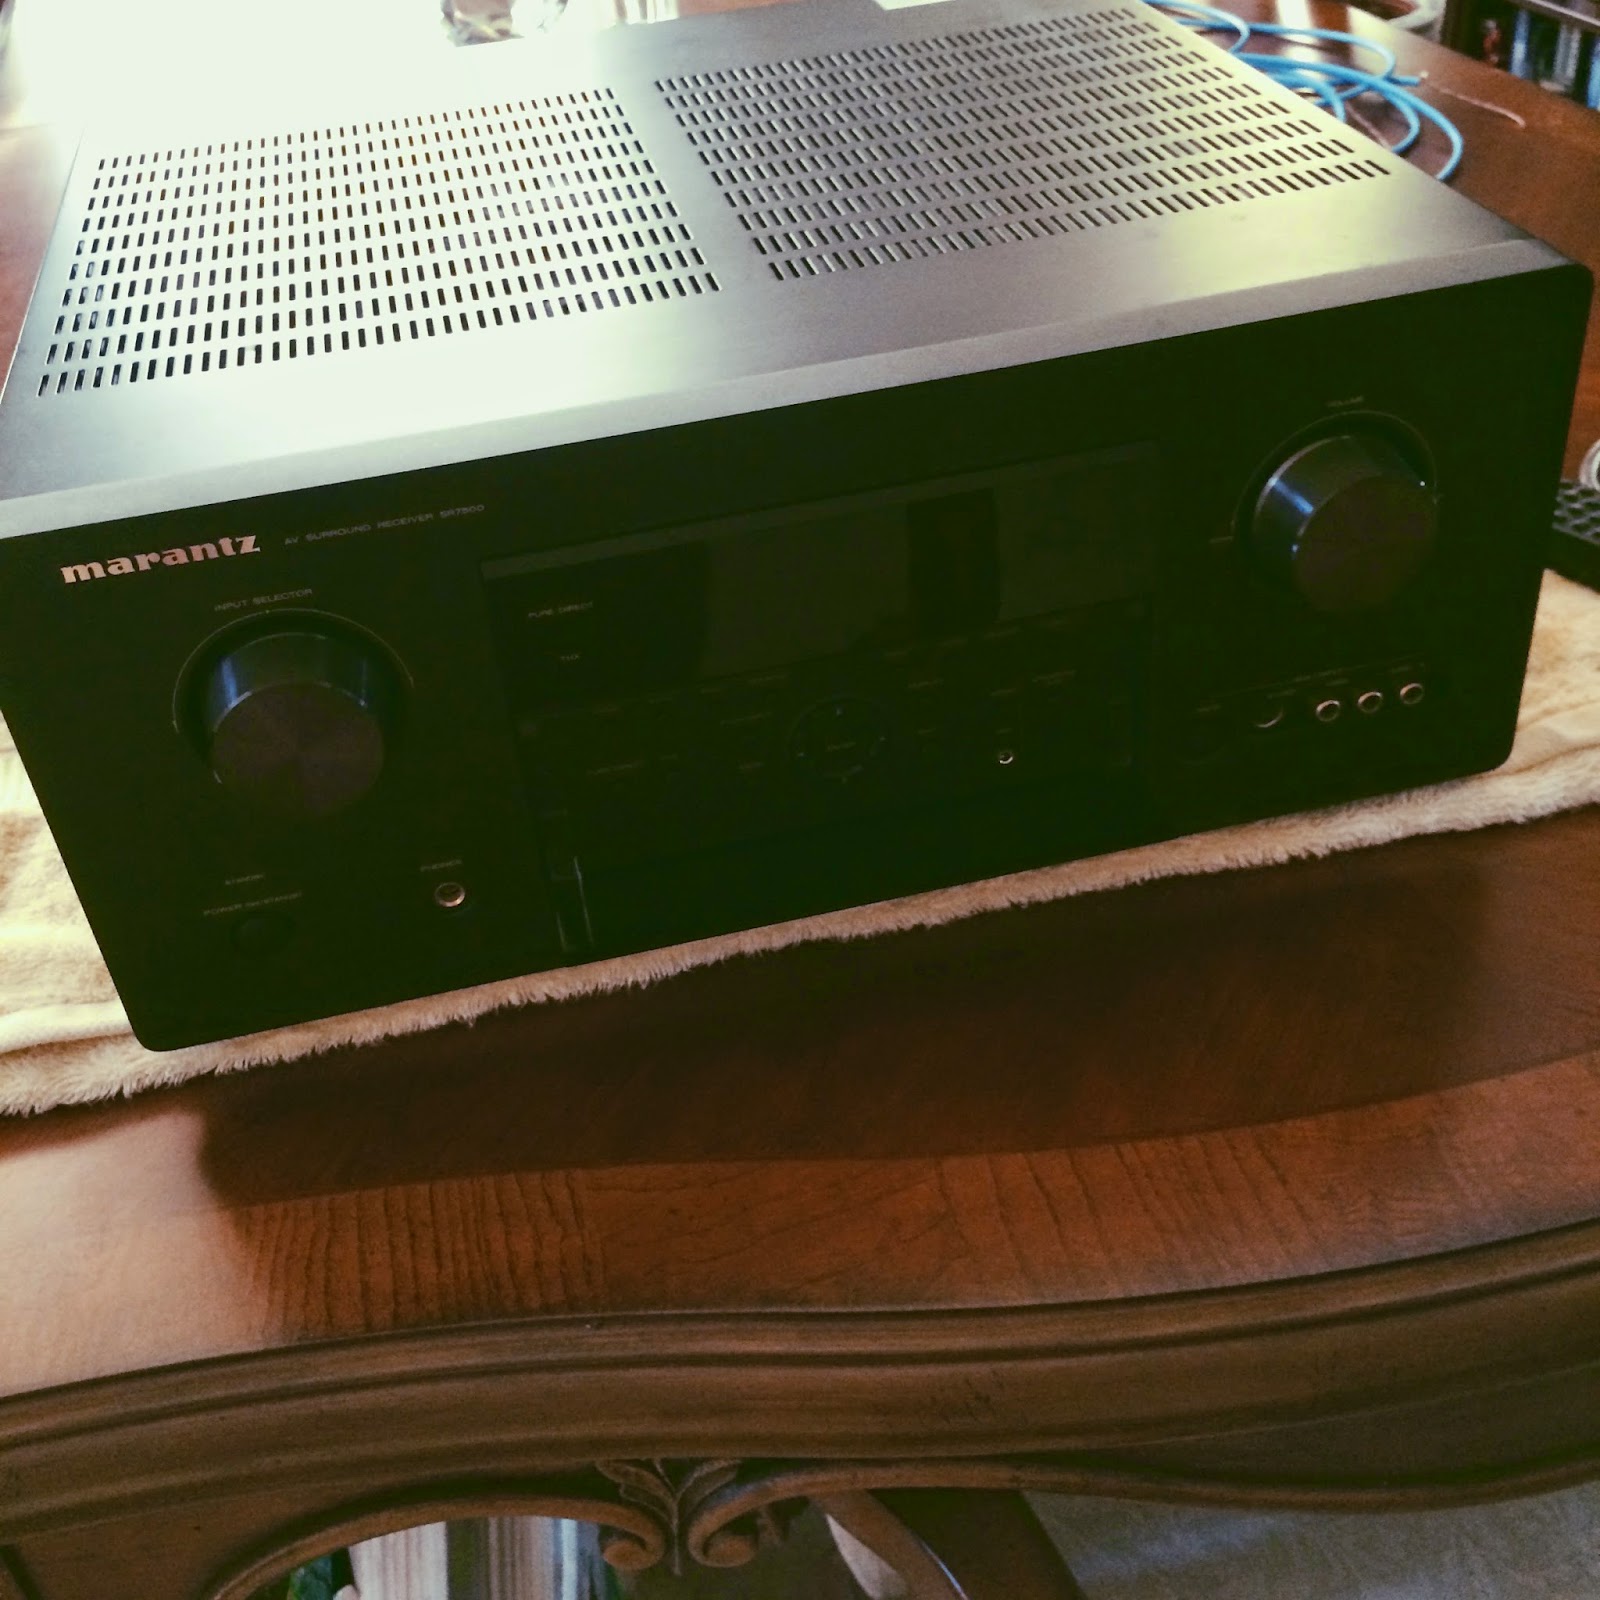
The next step was completed with the expertise of my dad, the audiophile. I could have purchased an amp from Parts Express, but at this point my dad wanted in on the fun. He occasionally goes to the flea market or swap meet to scout for electronic equipment, so he offered to look for a used one. A few weeks later, this showed up!


It's a Marantz SR7500. My homework was to read over the manual for this model, and play around! It's a pretty old amp, so it can only play CDs or radio. To connect it to my computer, I'll need a converter -- I'm currently working on that part.


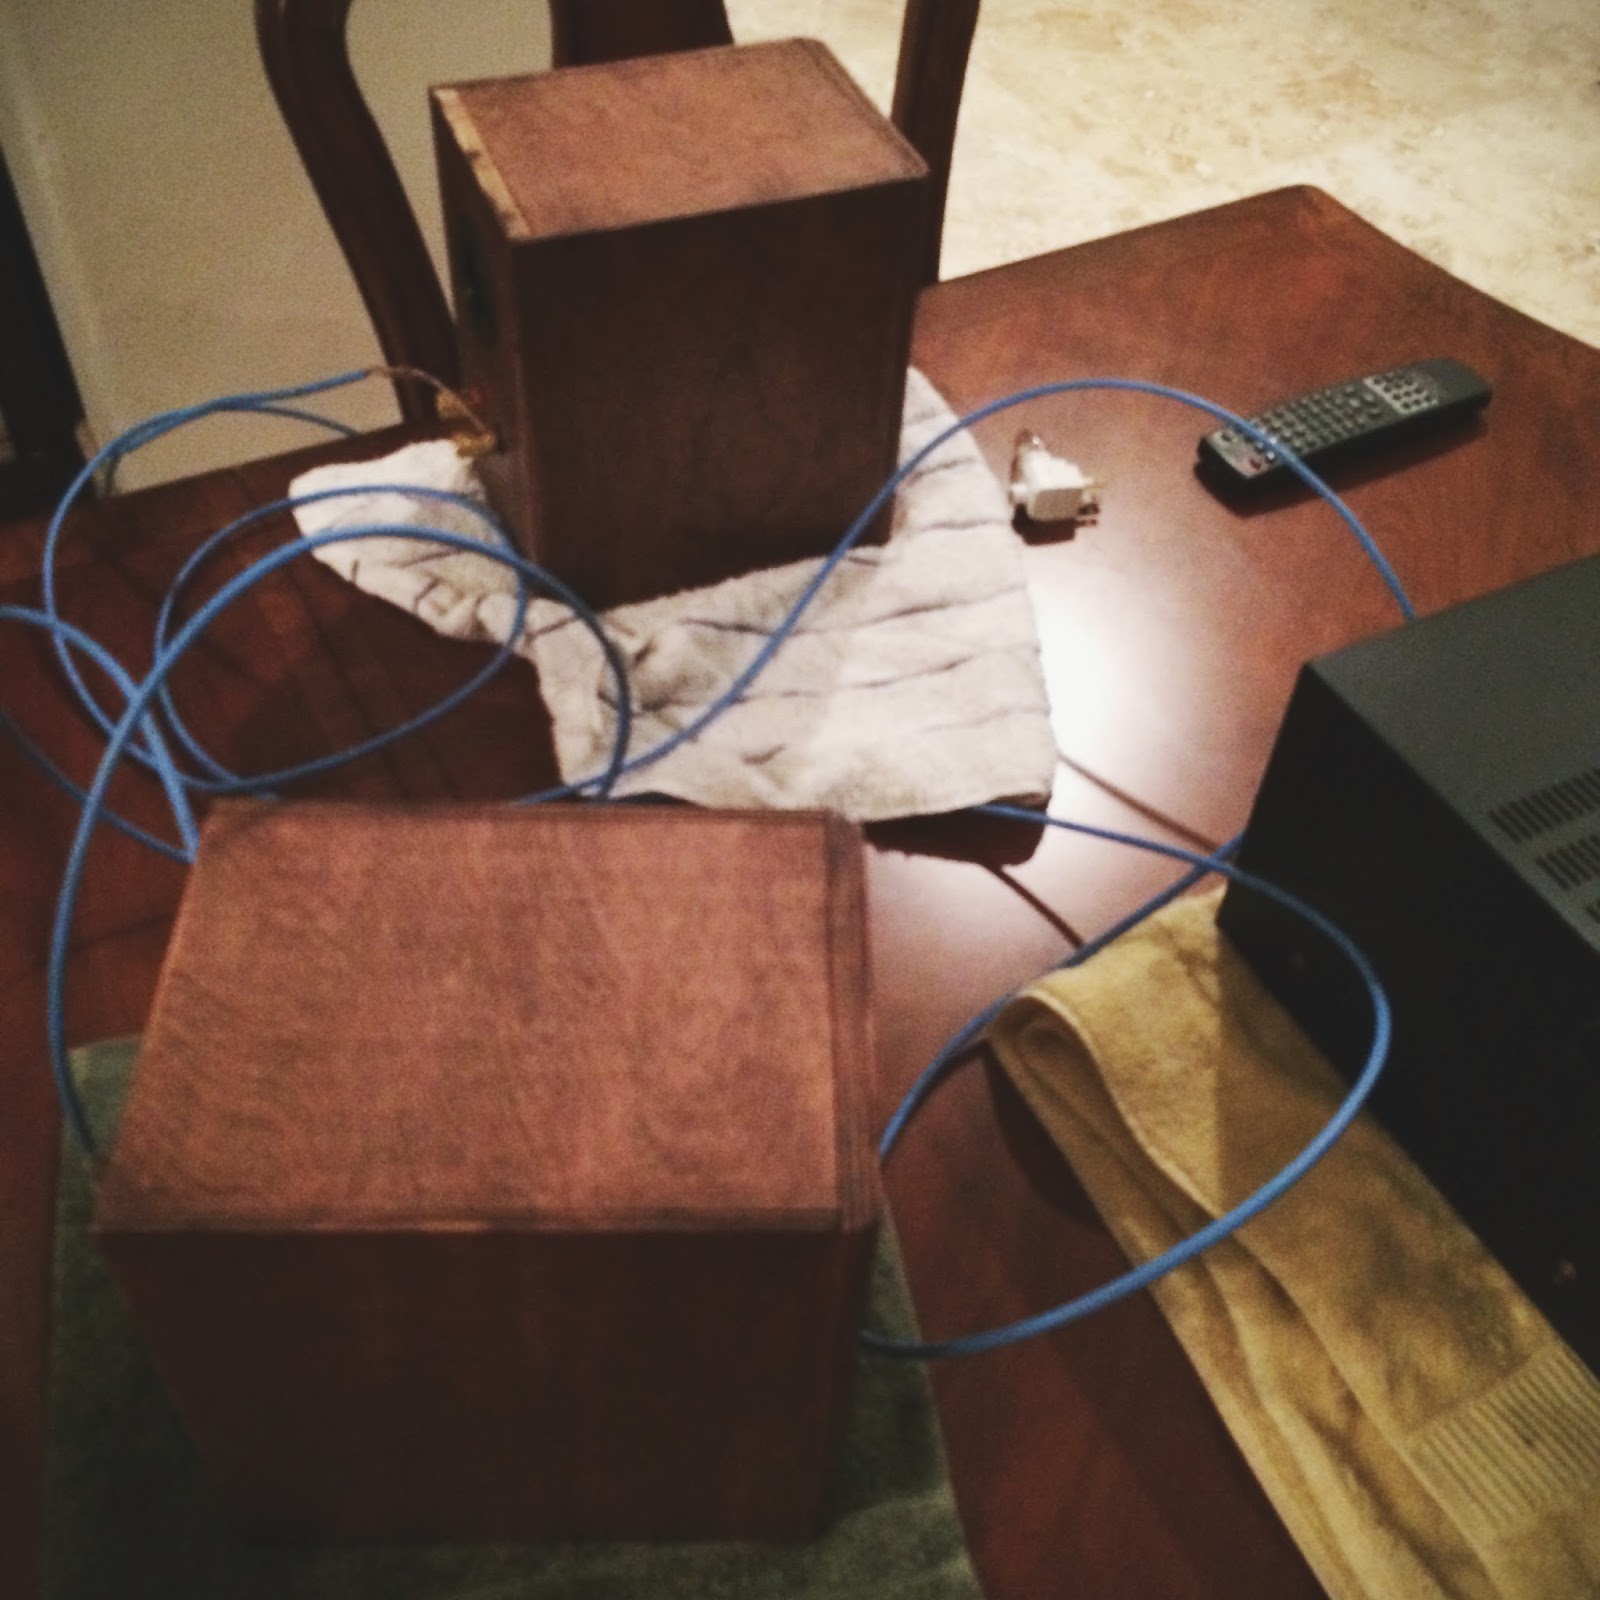
After making sure I had the red/black wires correct, we hooked the speakers up to the amp. The first song that came out was an opera piece, and I nearly cried. I mean, the opera song was beautiful, but it's just so exciting when something that you create by hand actually works!


Thus concludes my DIY Speaker project for now. Since I don't yet have the ability to connect to my computer, I've only been playing CDs. I don't own too many CDs, but all the ones I own are absolutely incredible with this new setup. My small collection includes some favorites that I scored from the KUCI album sale, Above and Beyond's acoustic album, two Sleepthief albums, and an older release by Sleeping at Last. I think I have a great reason to start collecting CDs now!

They say once you become an audiophile, you can never go back... I certainly don't have enough credibility nor experience to call myself an audiophile, but I can see why it's true. The sound is just so much larger than the tiny desk speakers I had before. If you dim the lights, it really feels like the orchestra is right beside you, and the singer is center stage just a few feet away from your seat.

I really recommend this project to anyone looking for a DIY craft with a very, very high return of enjoyment :) Even if you have no background in audio -- part of the fun is in learning something new! 

Sunday, June 2, 2013

Desktop Designing

I'm quite proud to say that today I stumbled upon, toyed with, and actually managed to produce something of aesthetic value entirely on my own with the program


Yes, I realize that it's been around for a while and I'm a little behind in thinking that this is a novelty but regardless, I still spent a good two hours completely enthralled by its endless customization options.

I chanced upon this magic when I was browsing the internet for free tutorials on how to use Adobe Illustrator and ended up on Lifehacker. Browsing through a couple of Lifehacker pages about the Creative Suite, I came across THIS PAGE and was hooked. I read through other posts tagged "rainmeter", downloaded the program, and got to work.

After much tinkering, here is the final setup that I made !


M Y   D E S K T O P   B E F O R E

pretty minimal
A N D   A F T E R  ! 

widgets!

I thought about using one of thousands of readily available pre-made themes, but after scrolling through a few I realized that there were a lot of skins that many of them had in common. I decided to go searching for the sources of these skins, and these are the ones that I ended up choosing: 

- THE ENIGMA SUITE for the icons, calendar, weather, news, music, and summary widgets
- ENCODED  for the transparent box
- PRAGMATIC, for the large date and time display

I downloaded Enigma Arcs, Deux, and Owlet UI as well because I thought they looked neat, but couldn't find a good place for either on my screen so I will hold on to those until I decide to change my wallpaper... I had so much fun with the design process that I can't wait to start with a new blank slate and explore more layouts. 

Before this, the only customization I had done with my computer was Rocketdock, because I wanted to get all the icons off my desktop and I really liked the Mac OS tray feature. 

my cute little dock, pre-Rainmeter. It's still there, just slightly more hidden now.


As well as a Login image changer...

...which I just discovered that I can't show you because apparently one cannot take a screenshot of one's own login page... but it's basically just the same galaxy wallpaper instead of the Windows 7 default cerulean leaf image.

I already thought I was one fancypants for doing that, haha... but this program really showed me that there is so much more out there! Stay tuned for future layout updates... I consider this another of my crafty episodes... it's just crafting in a slightly different sense :) 

[[currently listening: Anjunabeats Volume 10]]

Wednesday, April 10, 2013

DIY Natural Leather Belt Craft


As most of you know, I love crafting-- but here is a project that Lucas enjoyed crafting too ! Granted, most of his crafting is done on Diablo but this time we decided to be productive and make something useful :) Our project of choice was a natural leather belt !

I've been eyeing this really nice Tanner belt for a while ever since I retired my old leather belt, but it is just so expensive that I couldn't justify the purchase. 


So the next best thing was to make our own, at a fraction of the price ! We went to the nearby Tandy Leather Factory in Costa Mesa, which sells all sorts of leather goods, from full hides to straps, buckles, tools... even moccasins. The employees were really nice and helped us make sure we had everything we needed. 

So, if you wanted to make your own natural leather belt for much cheaper, read on :) 


Here are the materials you need:
- a belt blank (you can buy one with or without pre-punched rivets, we don't have any rivet-punching tools so we opted for a pre-punched one) 
- buckle of your choice
- a leather hole punch (unless you want to be super badass and use a hammer and nails?)
- a bottle of leather sealant (to make sure your belt lasts !)


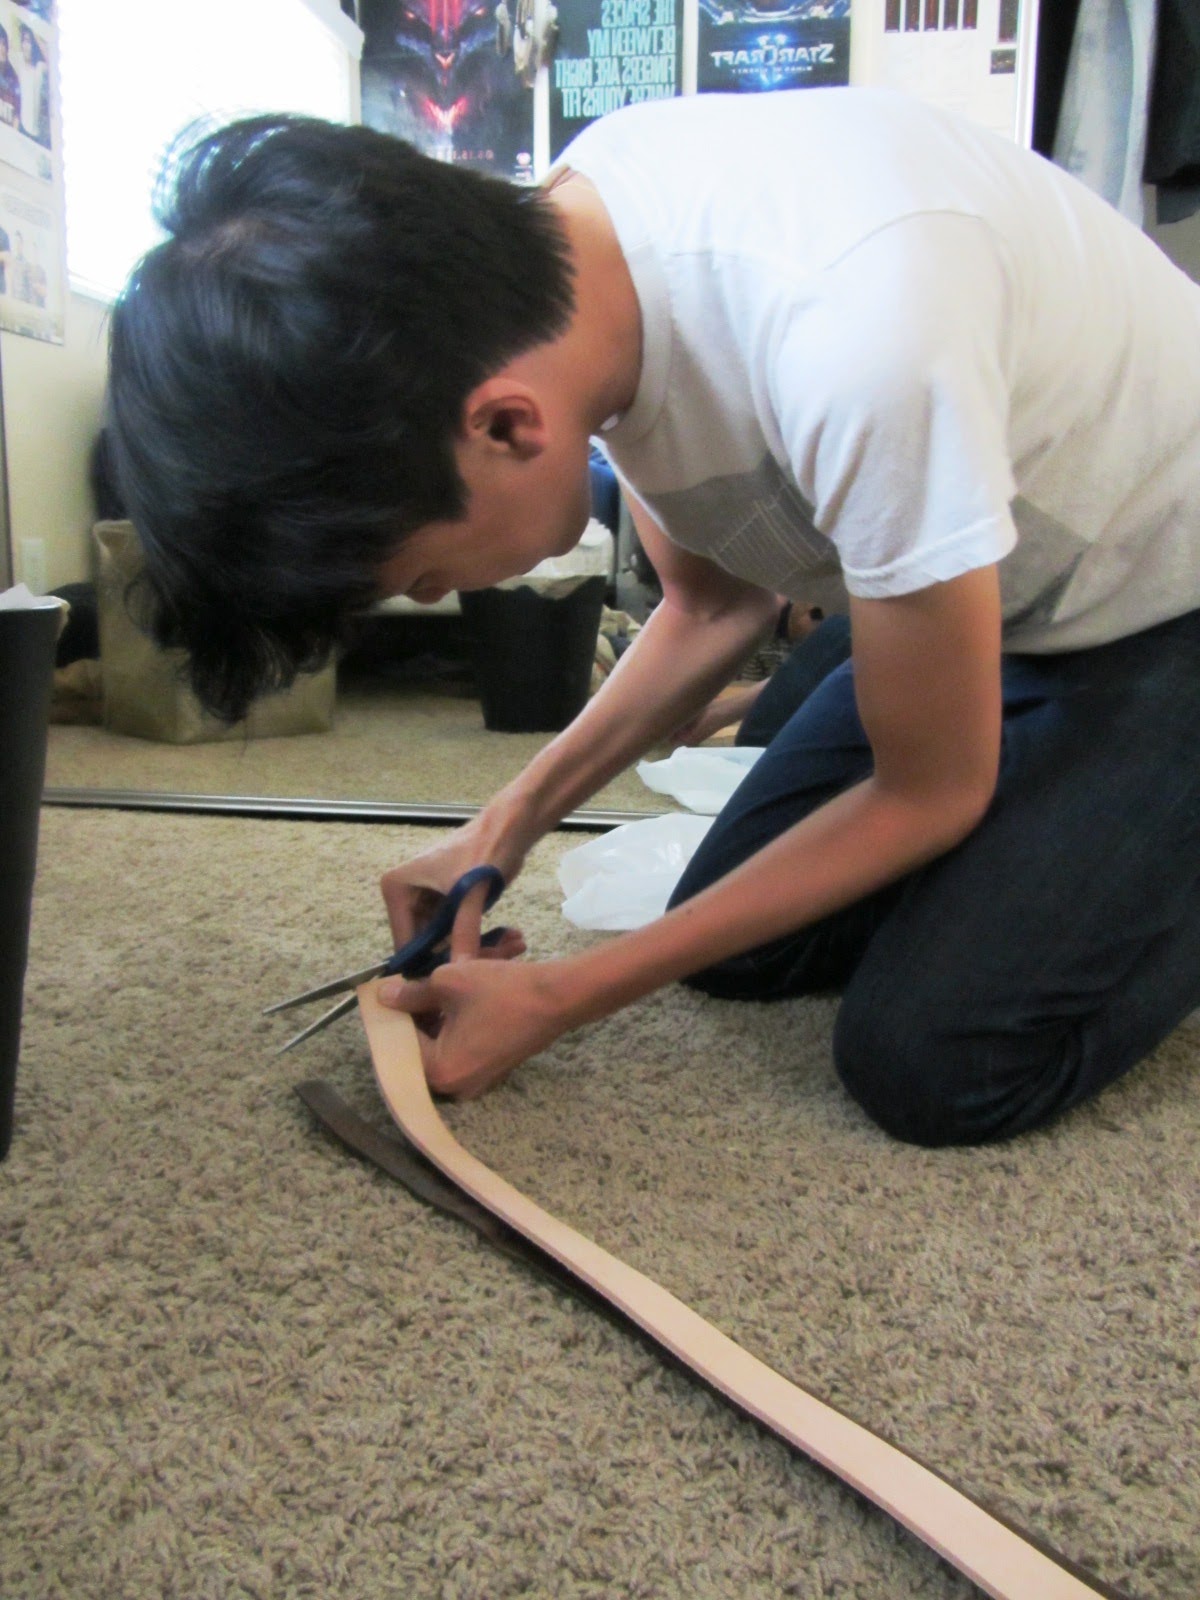
First, you'll have to trim the belt blank to your waist size. The easiest way to do this is to use an existing belt that fits you well. Use scissors to cut off the excess, and then make sure it fits snug around your waist. 


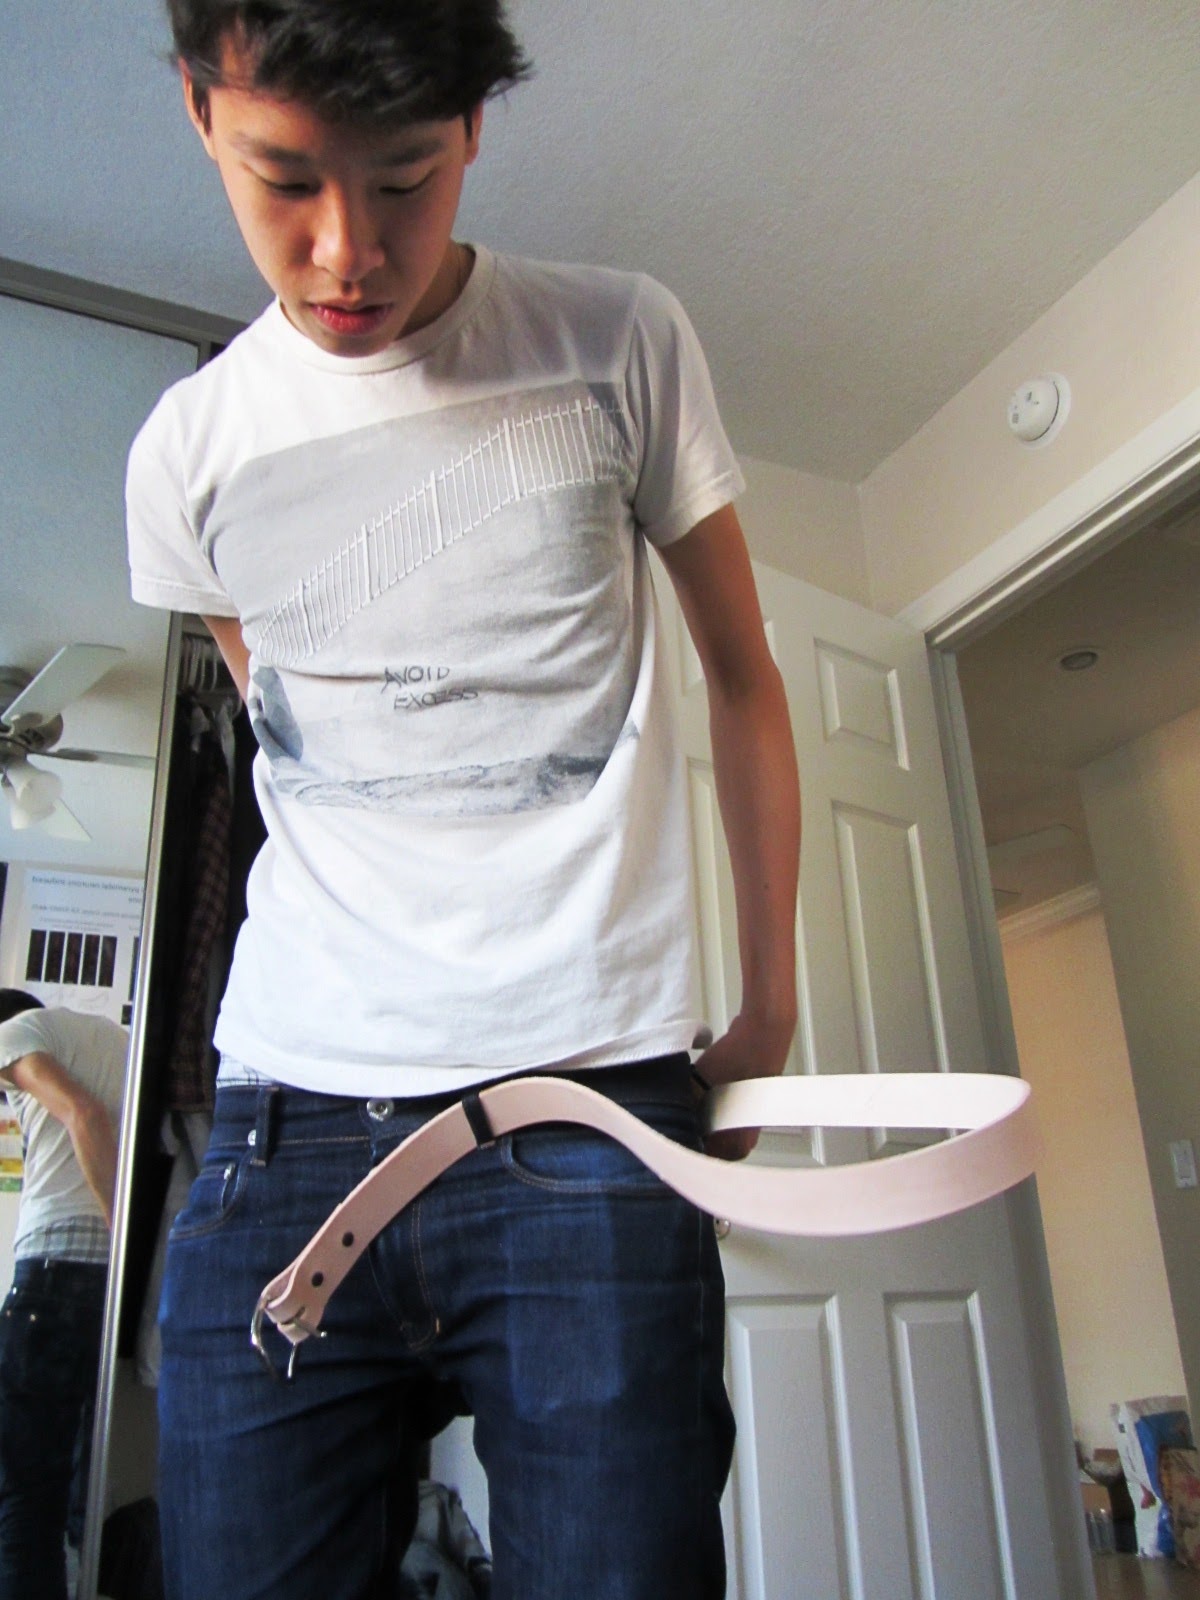
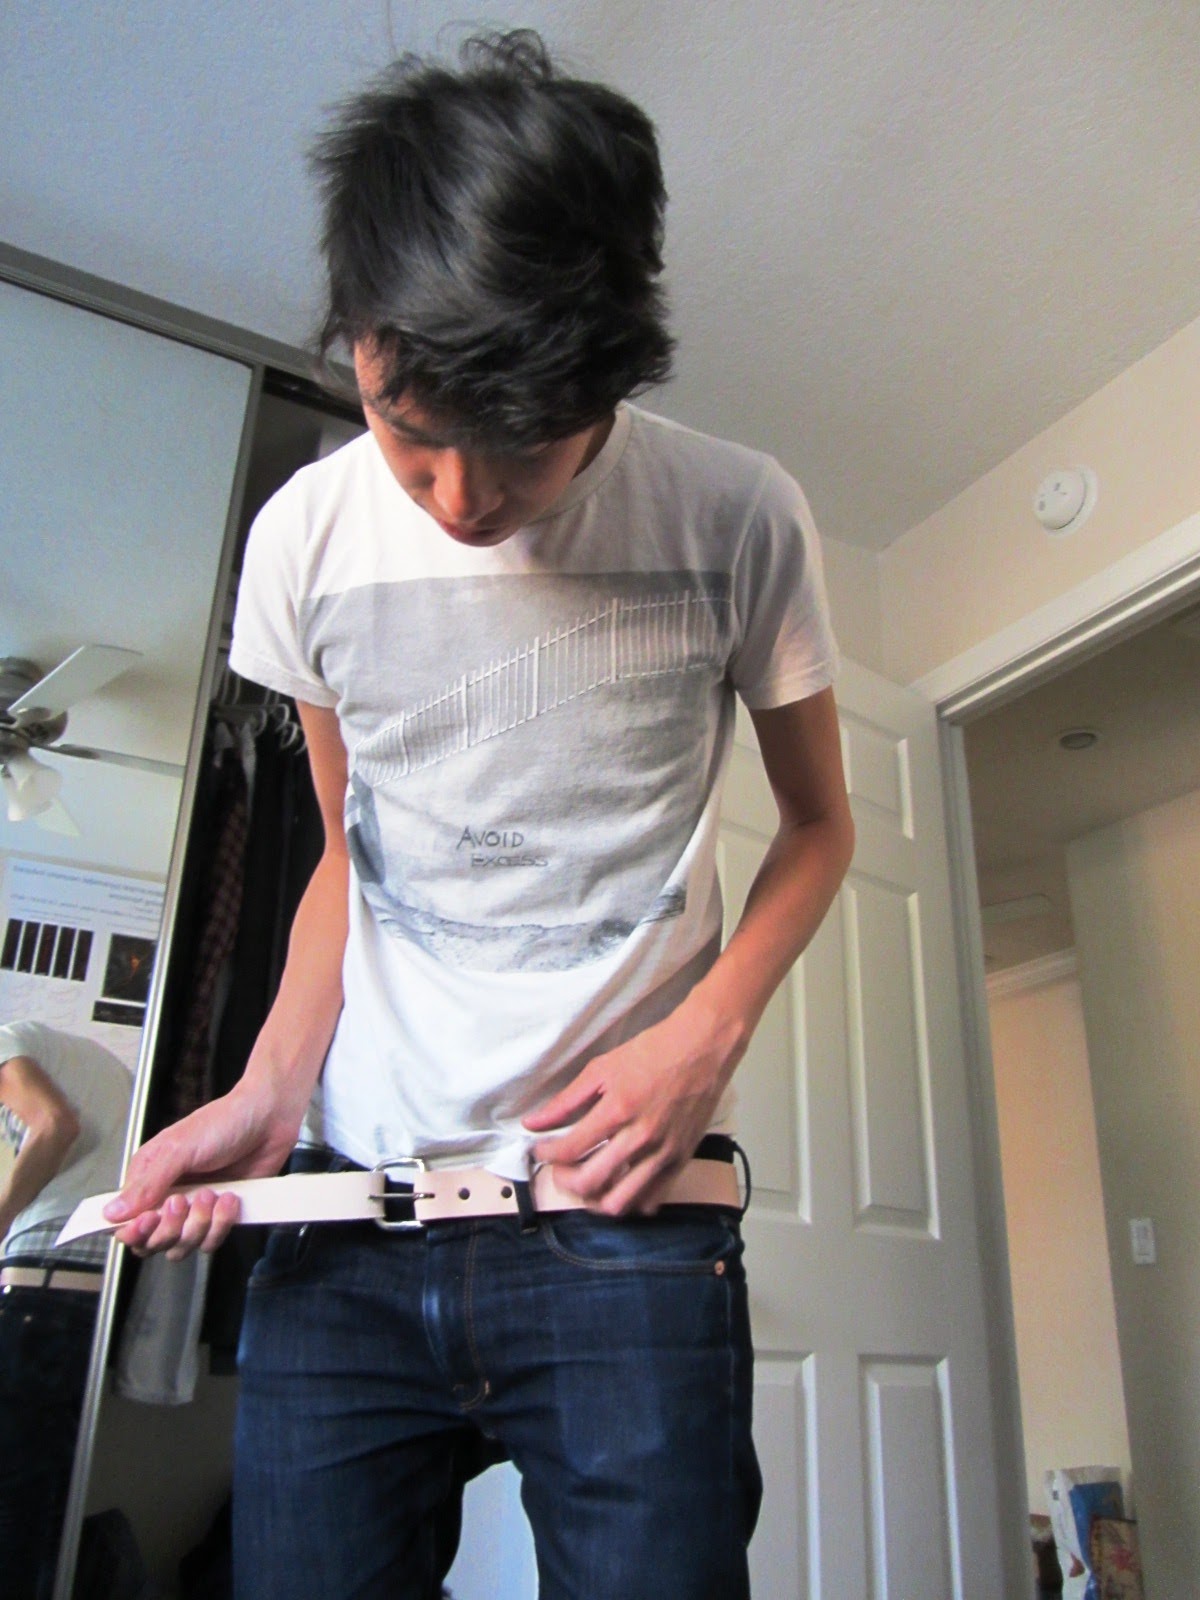
Next, you'll have to find out where the holes go. This can be tricky if your existing belt isn't already a perfect fit. With the belt around your waist, pull the end tight and mark where the middle hole should be. 


The rotary leather punch is a really funny looking tool. We practiced putting holes in the excess strip that we cut off the end of the belt blank, just to get a feel of how it works before tackling the final product. Leather is really tough, and it sounds like you are crunching bones when you punch through it O_o 

watch out, I've got a scary looking hole punch

Anyways, so using the mark you made for the middle hole, mark two more holes on either side of it. This way, even if you get fat (or skinny) you're still covered. Then, punch away. 


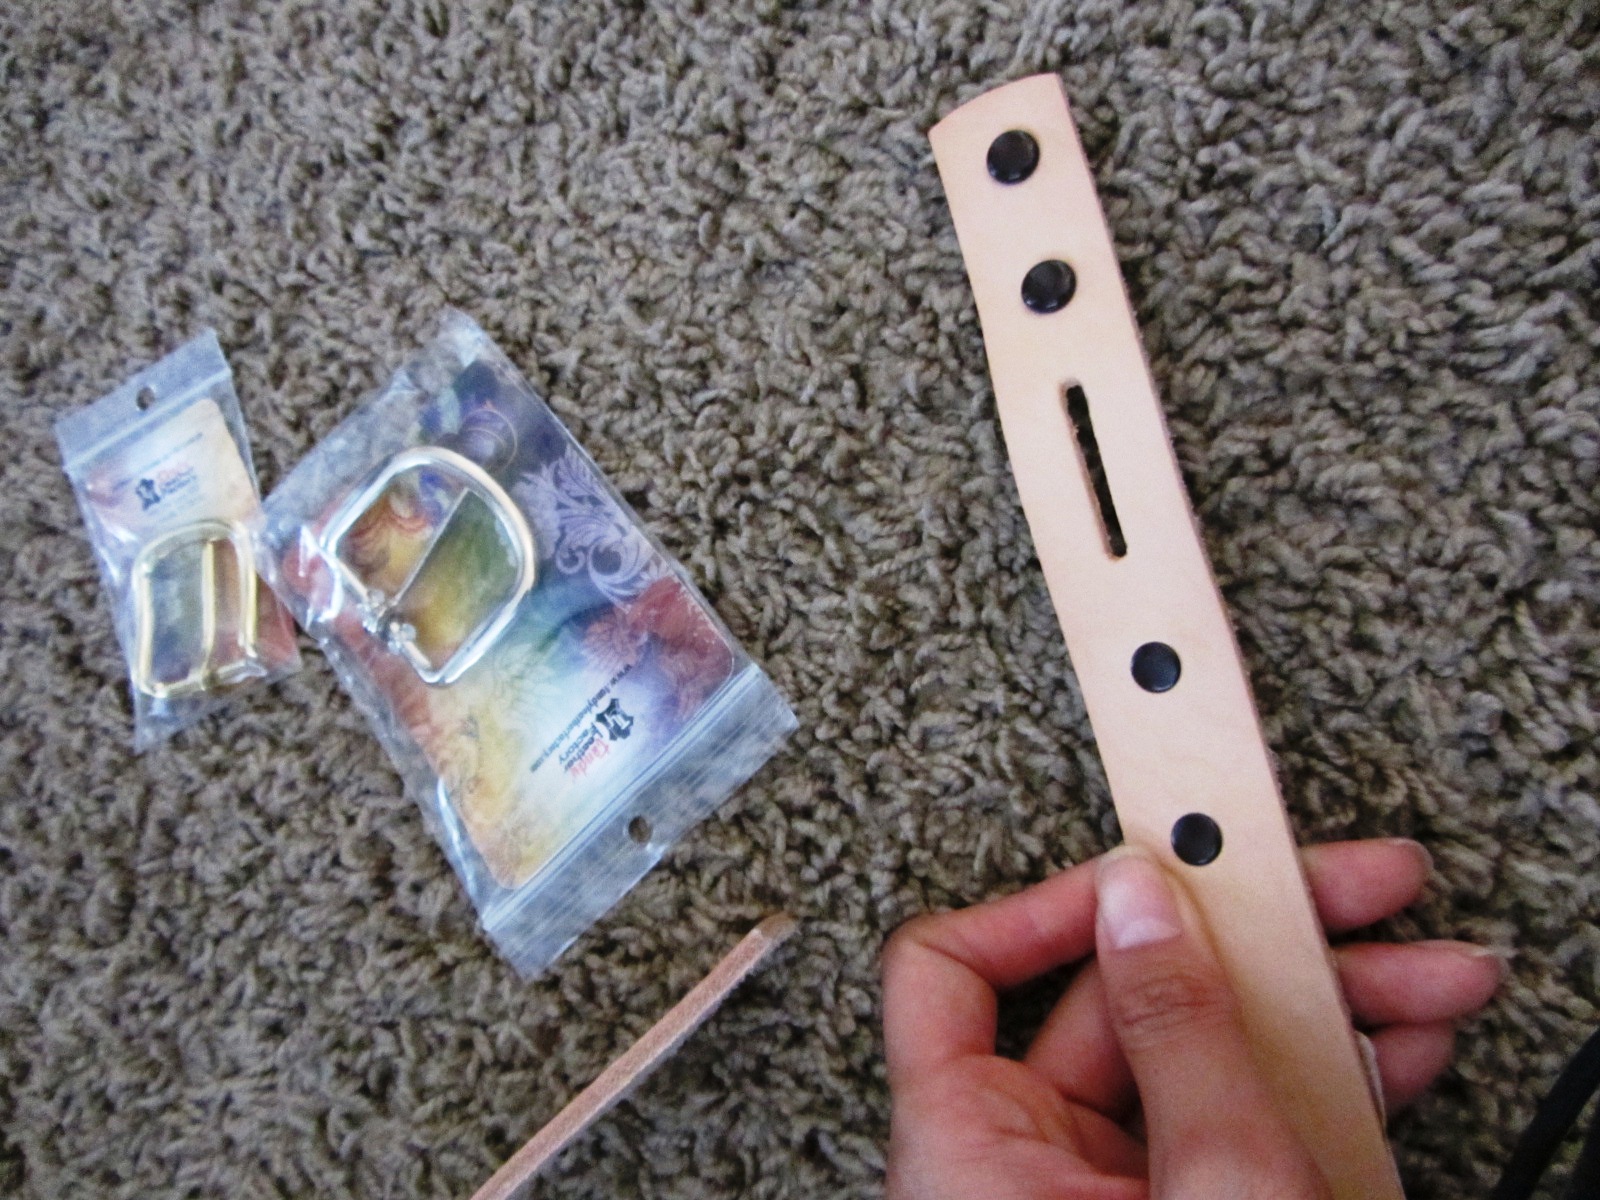
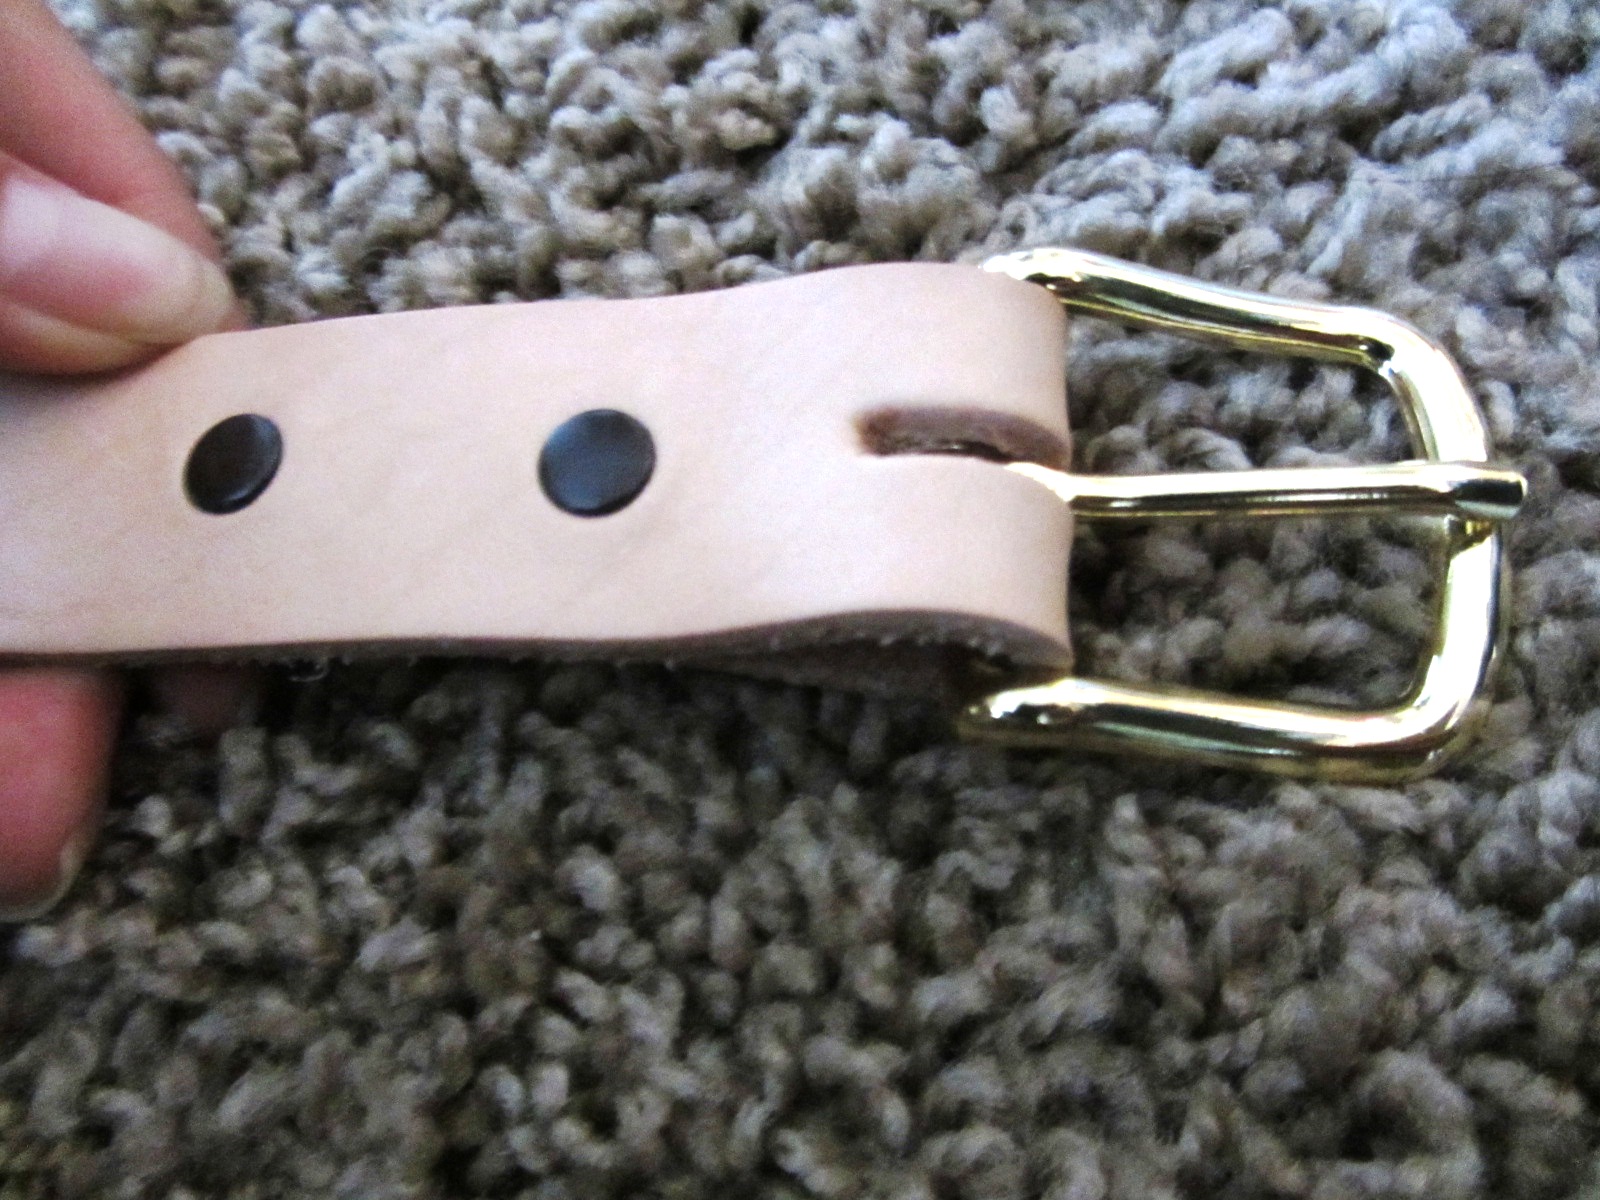
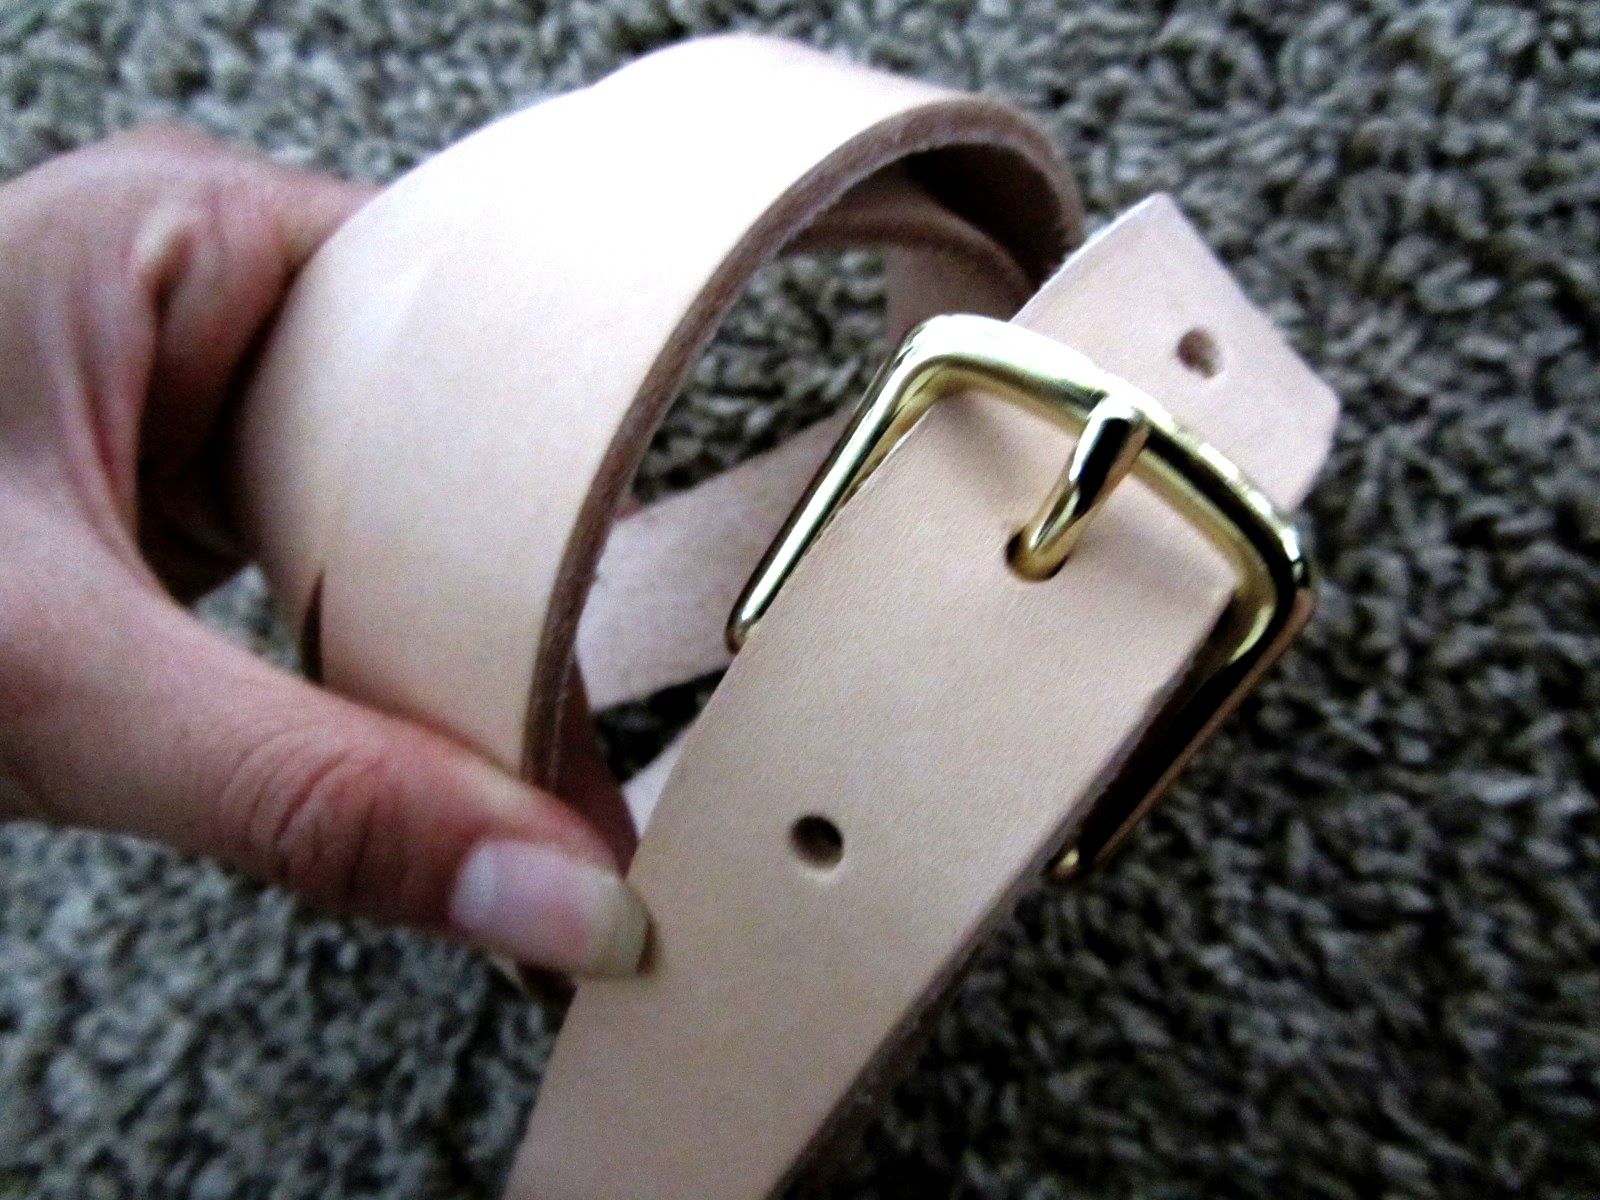
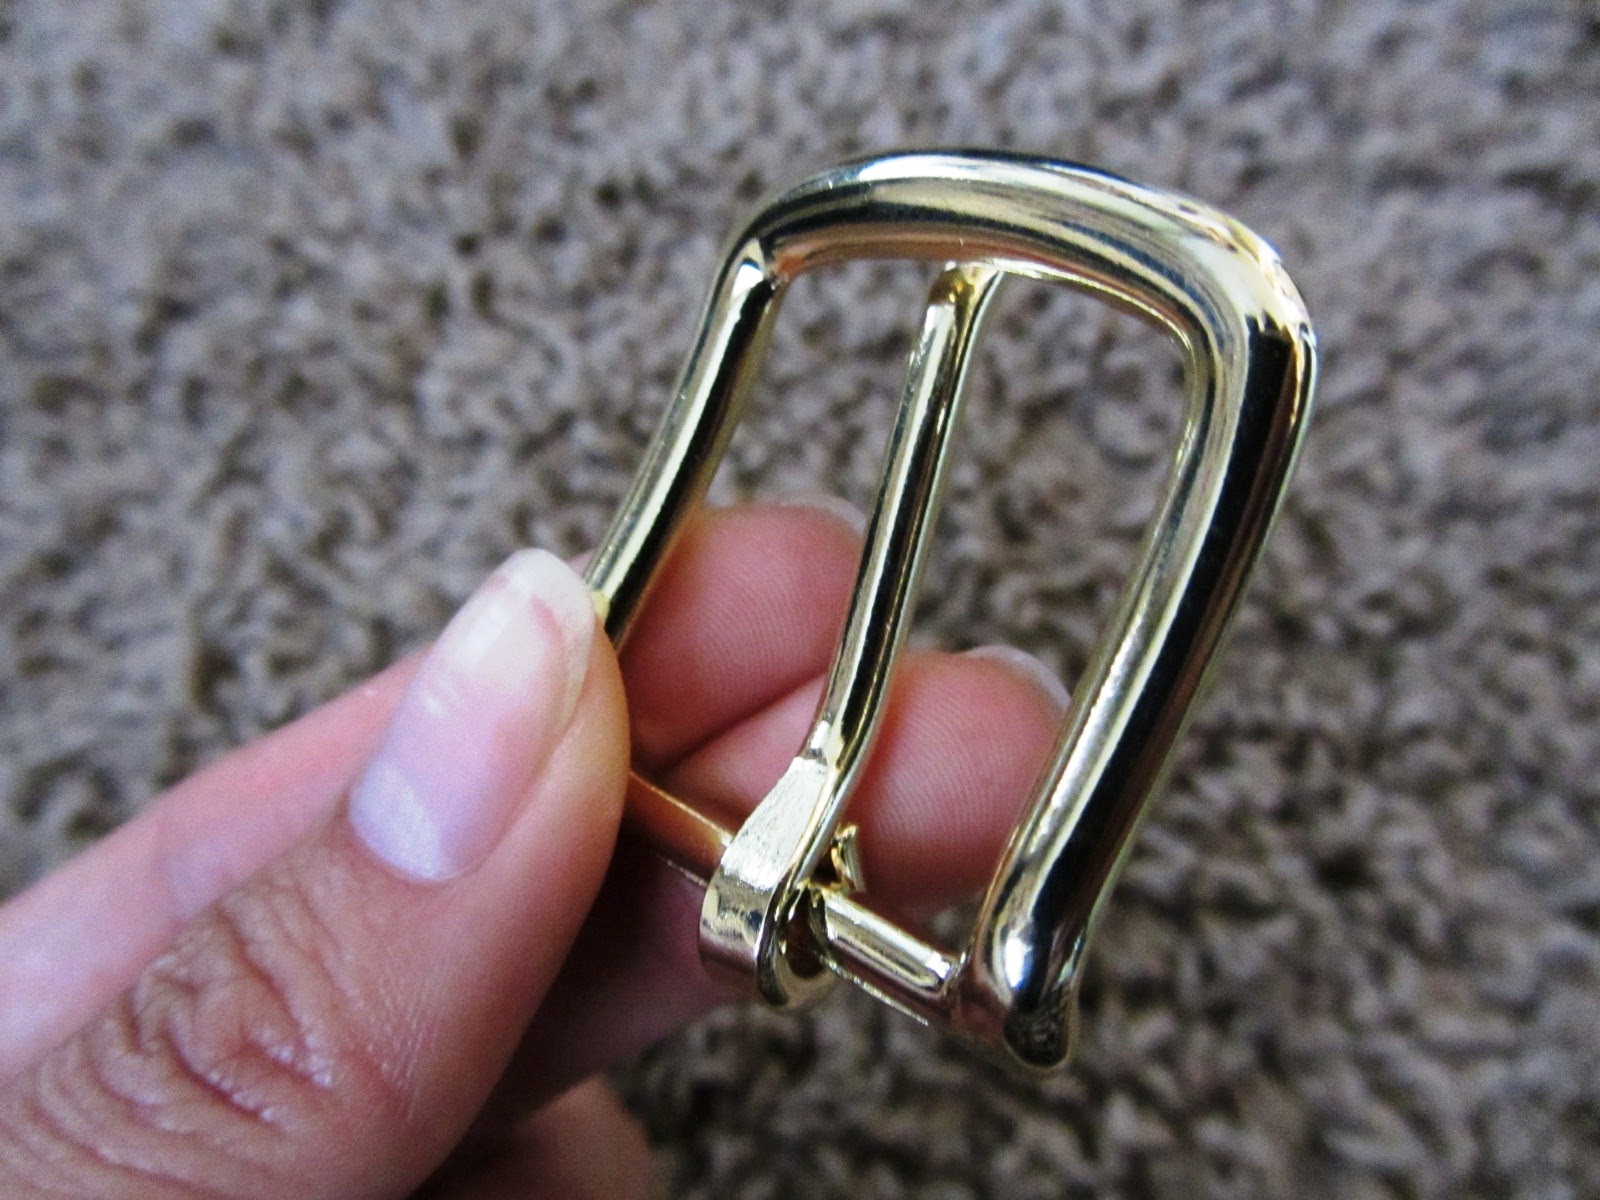
Now it's time to put the buckle in ! This is what the buckle end of the belt blank looks like. 


shiny buckle !

Thread the belt through the buckle, and make sure the fastener goes through the little gap in the middle of the strap. 


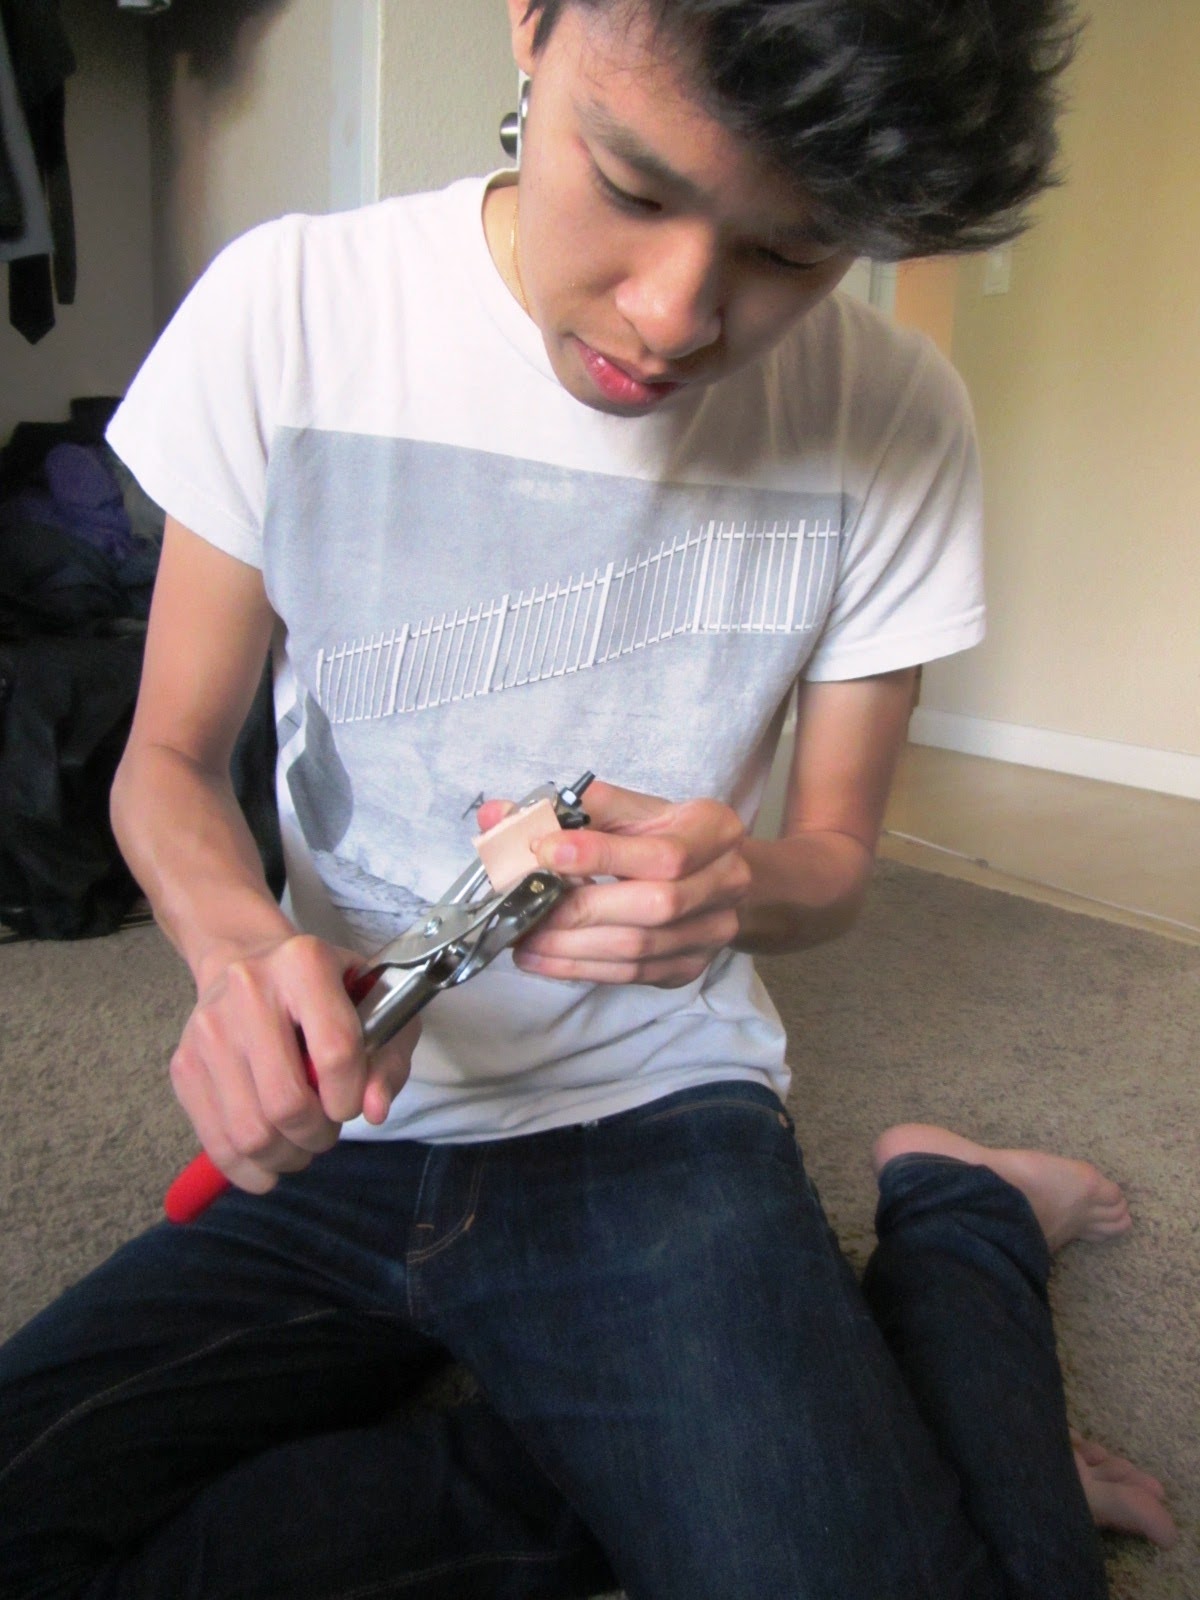
Fold the strap over the buckle and snap the rivets together. 


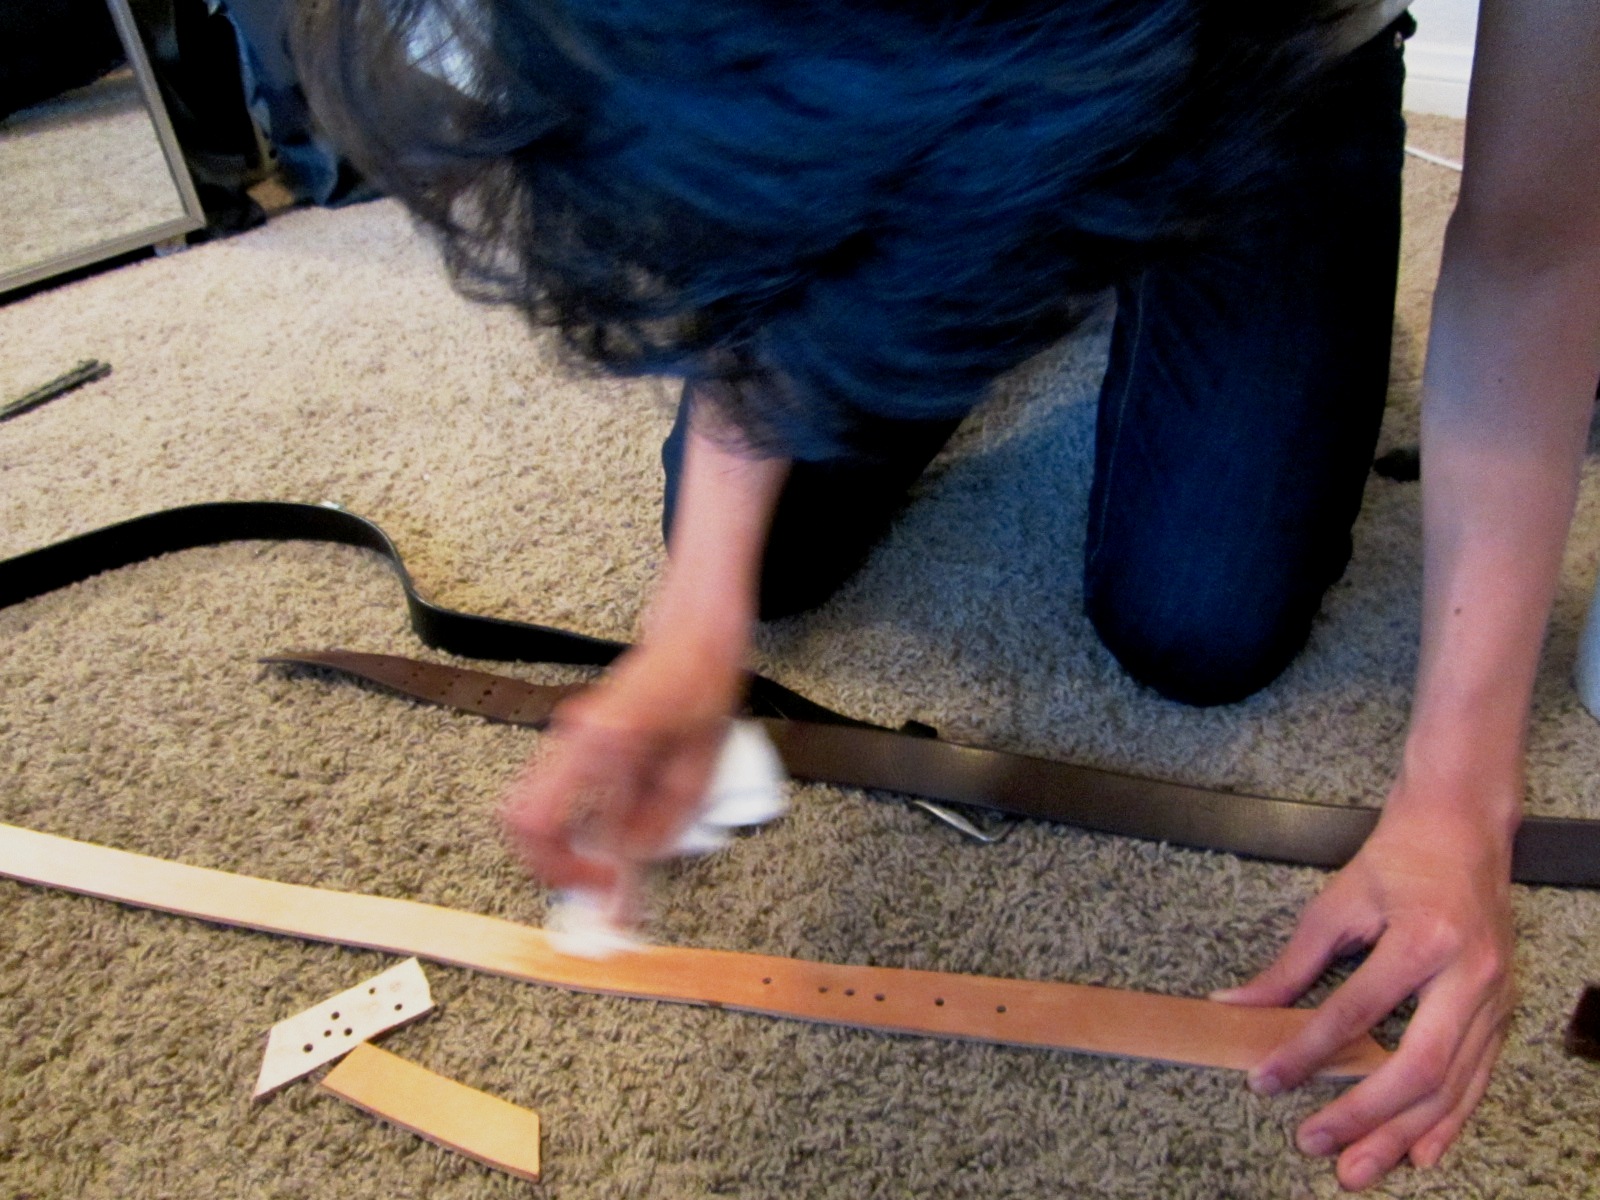
To protect the leather from water and other possible damages, you need to seal it. This is the small bottle of sealant we bought from the store, it was around $6. 


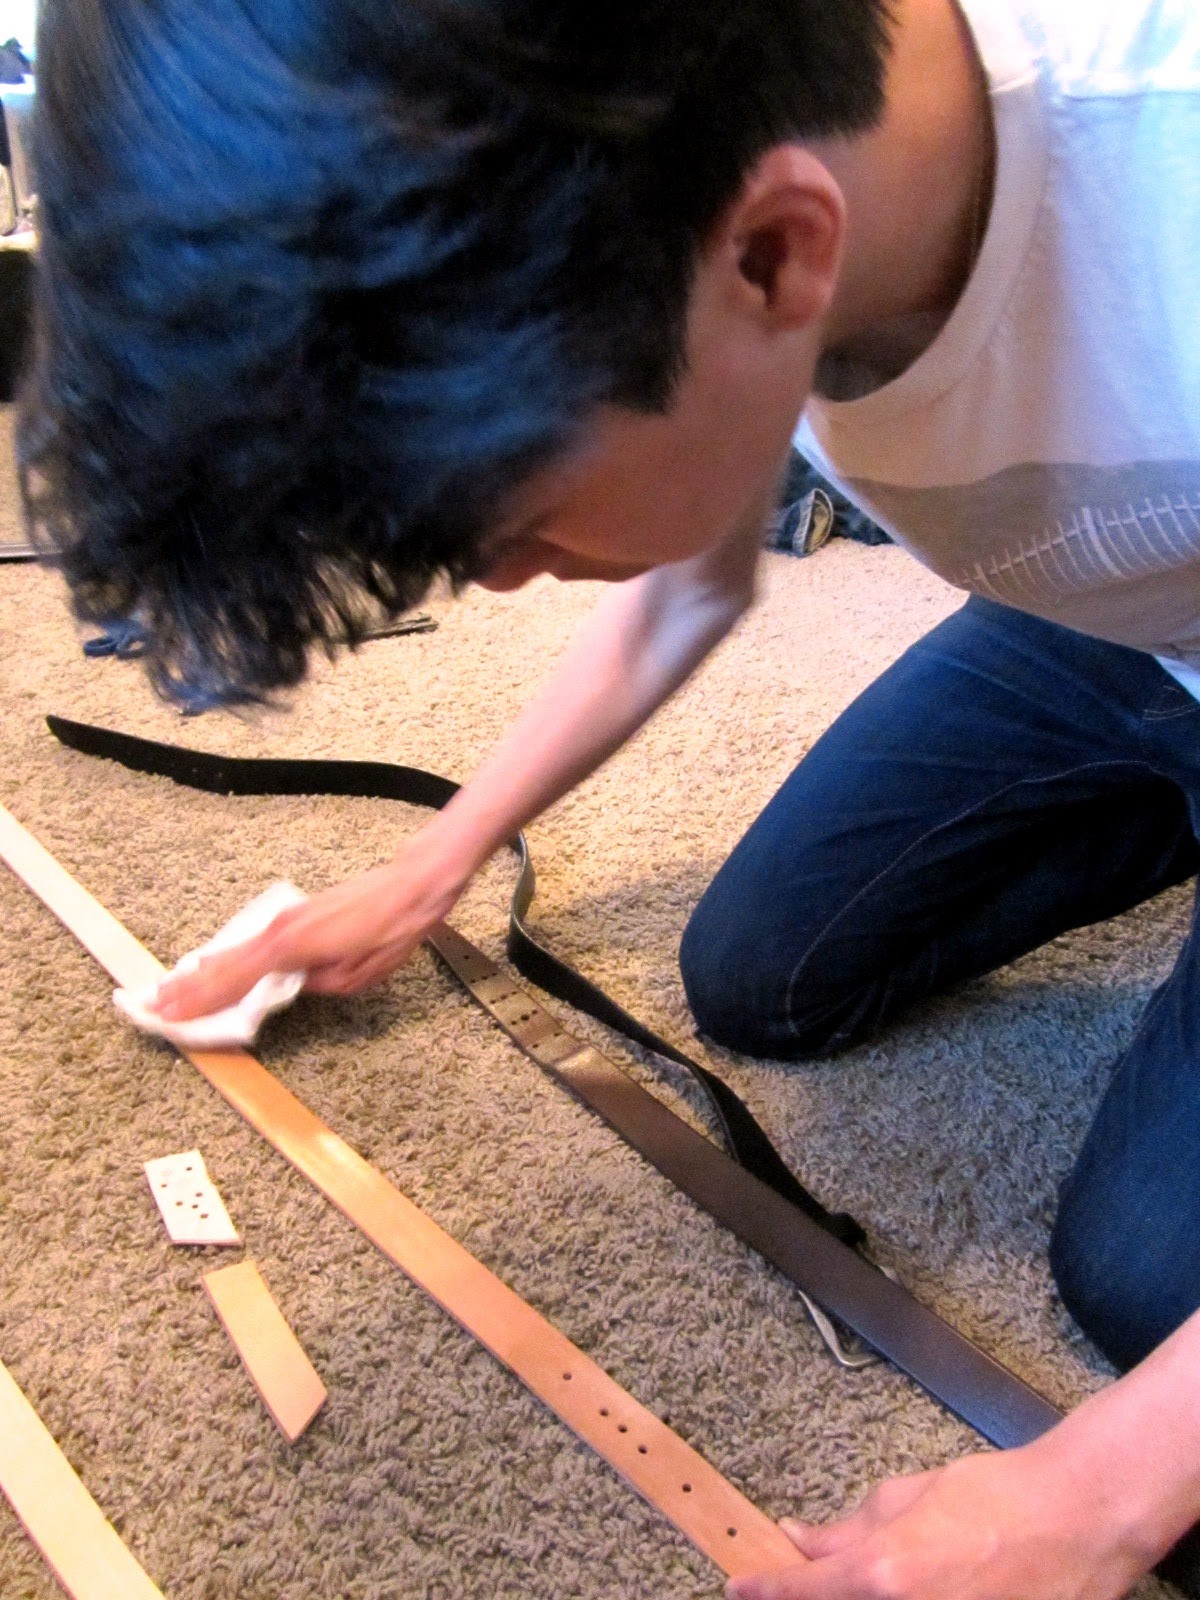
Using a paper towel, generously wipe the sealant all over the belt. As the leather gets wet, it will turn darker, but it dries almost to its original, natural color. Make sure to seal the edges as well, but the back side does not need sealing. 


Wait about two to three hours between coats (we cooked dinner and watched an episode of Game of Thrones). 


Wait a day for the sealant to really settle in, and that's it ! Your natural leather belt is done :) The total cost of this project, for both of us, was around $50. That's around $25 per person! Way cheaper than $105...and much more satisfying !


The really neat thing about natural leather is that it will wear and tan due to sun exposure, natural oils, etc, so that over the years it will develop a much warmer look that is entirely unique to the wearer. This is why it's such a trend among the raw denim crowd. Since I just made this one, I don't have an 'after' pic to show you, but maybe I'll do an update post in a year or so.

I'm excited to see how mine will look in a year or two. I hope you found this helpful and that it might have inspired you to do some crafting on your own :)